To store Christmas lights well, unplug each strand, test it, untangle it, wrap it on its own reel or cardboard winder, and pack it in a labeled bin in a cool, dry spot. That simple order keeps wires safe, bulbs whole, and setup fast next year. You do the small amount of work now, and you skip the knotted mess later.
Most lights do not fail because you used them too much. They fail because someone tossed them loose into a box, stacked heavy boxes on top, and left them in a hot attic for ten months. This guide shows you how to store Christmas lights so they come out ready to hang, strand by strand.
Test and Untangle Your Lights Before You Wrap Them
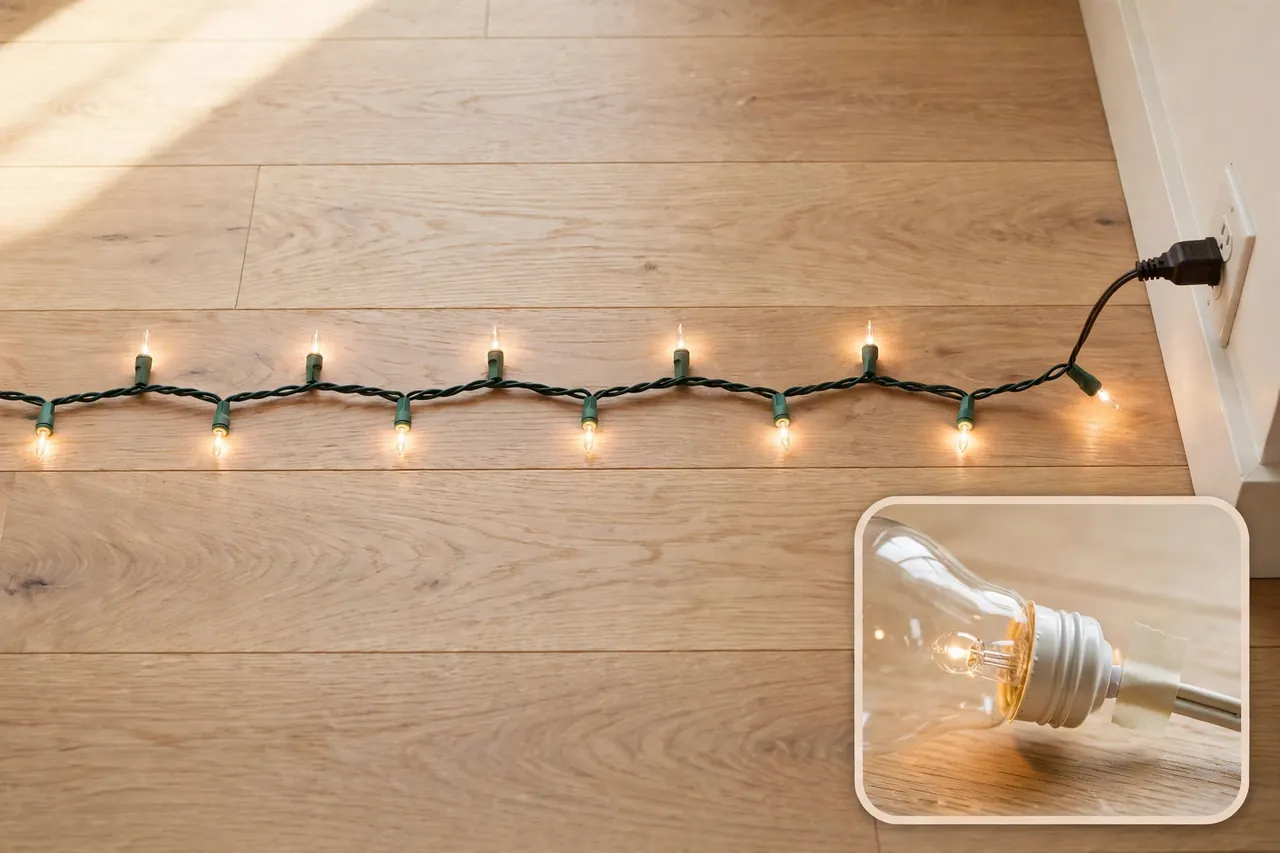
Never wrap a strand you have not checked. Testing now takes a few minutes. Testing next November, on a ladder, in the cold, takes far longer and feels far worse.
First, unplug the lights and let the bulbs cool. Then take each strand down in reverse order, from the far end back toward the outlet. Pull clips off one at a time instead of yanking the wire through them. Yanking snaps clips, kinks wire, and pops bulbs out of their sockets.
Next, lay each strand out straight on the floor or driveway. Plug it in and walk its full length. Look for dead bulbs, flickering sections, loose sockets, cracked covers, and damaged wire. Mark any problem spot with a small piece of masking tape so you can find it again in seconds.
Now fix what you can fix. Swap a dead bulb for the same type and color from the maker’s spares. If a section still stays dark after a bulb swap, or if you find frayed wire, a cracked socket, or exposed copper, do not store that strand for reuse. Retire it instead. Damaged wire does not heal in a bin, and it can turn into a safety problem next year.
Finally, untangle the strand while it still lies flat. Work from one end toward the other, and loosen each knot with your fingers. Never pull hard on a knot. A hard pull stretches thin wire and can break the connection inside a socket. Patience here saves the whole strand.
Wrap Methods Compared: Reels, Cardboard, and DIY Winders
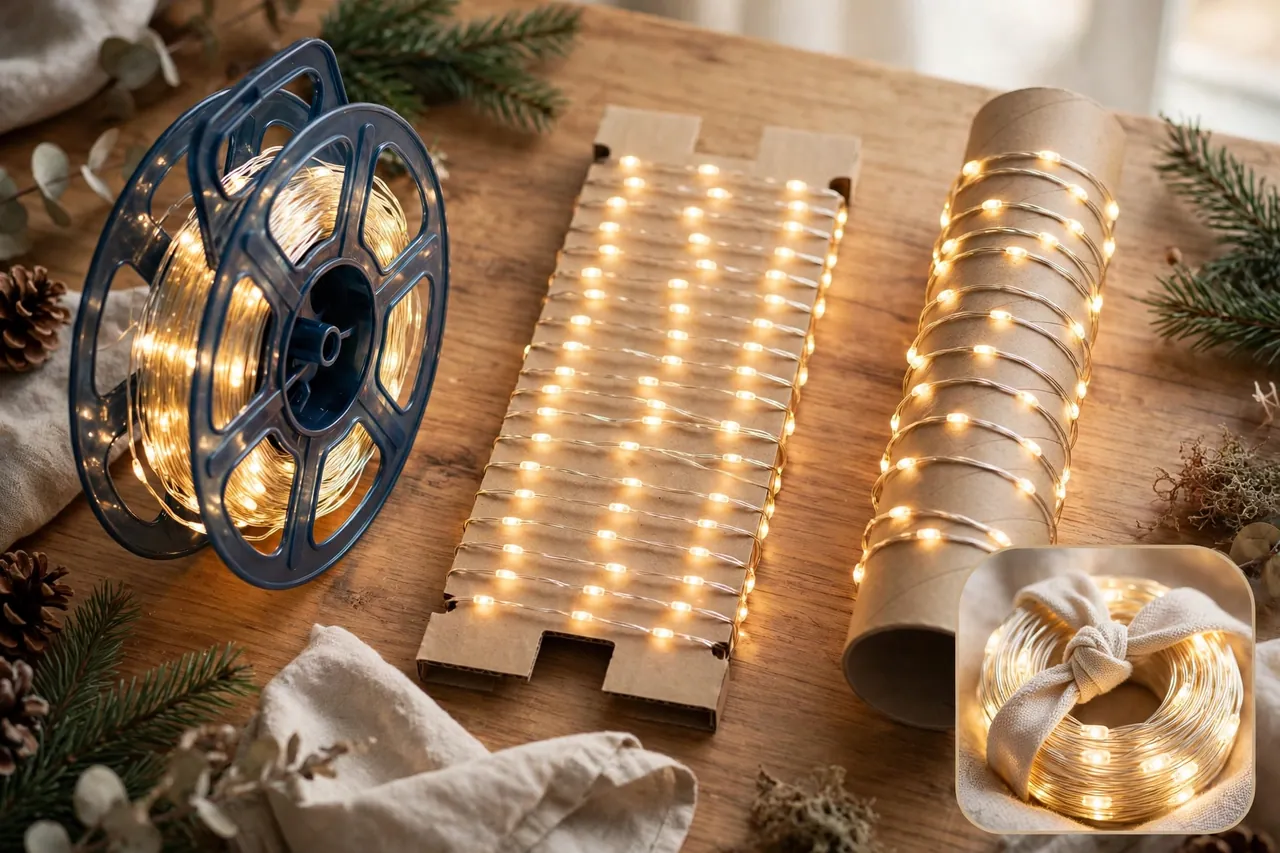
The best way to store Christmas lights is one strand per winder, wrapped snug but never tight. One strand per winder matters most. Several loose strands in one bin weave together, catch on plugs, and turn into one giant knot by next year.
Wrap with even, gentle tension. Tight wrapping squeezes wire insulation and stresses sockets. Loose, sloppy loops slide off and tangle. Aim for firm loops that hold their shape without pinching the wire.
Start at one end and keep the same direction all the way through. When you reach the other end, secure it with a soft twist tie or a Velcro strap. Avoid rubber bands for long storage. Rubber bands dry out, snap, and can stick to wire. Avoid bare metal wire ties too, because they can cut into insulation.
Choose a method from the table below based on what you already own and how long your strands run.
Wrap method comparison
| Method | Best for | Watch out for |
|---|---|---|
| Plastic Christmas light storage reel | Long outdoor strands and C7 or C9 strings | Do not overfill the reel |
| Flat cardboard winder | Standard string lights and tree lights | Replace soft or damp cardboard |
| Cardboard tube winder | Shorter strands and mini lights | Use a wide tube, not a narrow one |
| Garden hose reel | Very long commercial-style strands | Wind slowly so bulbs do not crush |
| Loose ball roll | Short mini strands in a pinch | Keep one strand per ball only |
Use a Christmas Light Storage Reel
A purpose-built Christmas light storage reel gives you the neatest result, especially for long outdoor runs. Hook the plug end into the reel, turn the handle or wind by hand, and keep each loop beside the last one. Stop before the reel fills to the edge. An overfilled reel crushes bulbs against the bin wall.
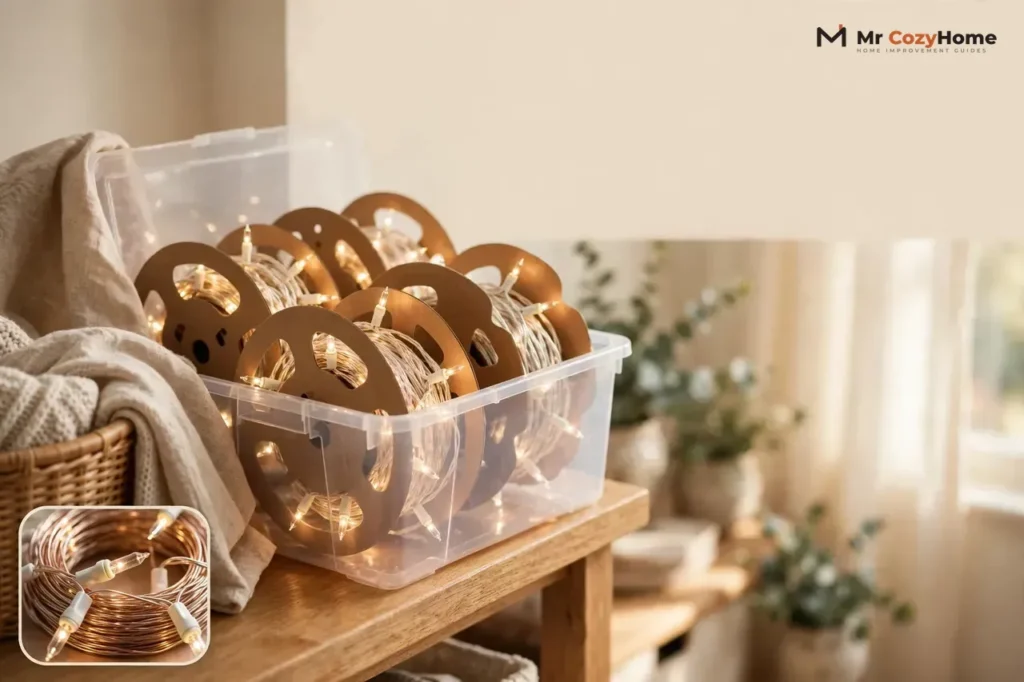
Reels also stack well. Lay them flat in a bin, one layer at a time, with a sheet of tissue paper between layers if bulbs press against each other. Label each reel before you pack it, because unlabeled reels all look alike in November.
Make a Cardboard Winder for Free
A sturdy piece of cardboard works just as well for most string lights. Cut a rectangle about 12 inches by 8 inches from a shipping box, and cut a small notch in each short end. Tuck the plug into one notch, wrap the strand around the board in flat, even rows, and tuck the far end into the other notch.
Cardboard winders store flat, so they fit neatly in a bin and waste almost no space. Check the board before you reuse it next year. Toss any board that feels soft, damp, or crushed, because a weak board bends and lets loops slide off.
Try a Hose Reel or a DIY Winder
A garden hose reel doubles as a Christmas lights storage reel for very long strands. Wind slowly, keep the loops even, and stop before bulbs pile up on top of each other. A clean hose reel with a crank saves real time on a big outdoor display.
For a quick DIY winder, use a wide wrapping-paper tube or a large cardboard roll. Cut a notch in one rim, tuck the plug into it, and wrap in one direction with light, even tension. Skip narrow toilet-paper tubes. A tight, narrow core bends wire sharply and puts extra stress on every loop.
Some people roll mini lights into a loose ball, like a ball of yarn, and tuck the end plug into the ball. That method works for one short strand at a time, and it unwinds smoothly from the outside. Southern Living also describes wrapping lights into a loose hand-sized ball as a simple method that needs no extra props. It fails when you mix strands together, so keep the one-strand rule even here.
How to Store Icicle and Net Lights Without Snags
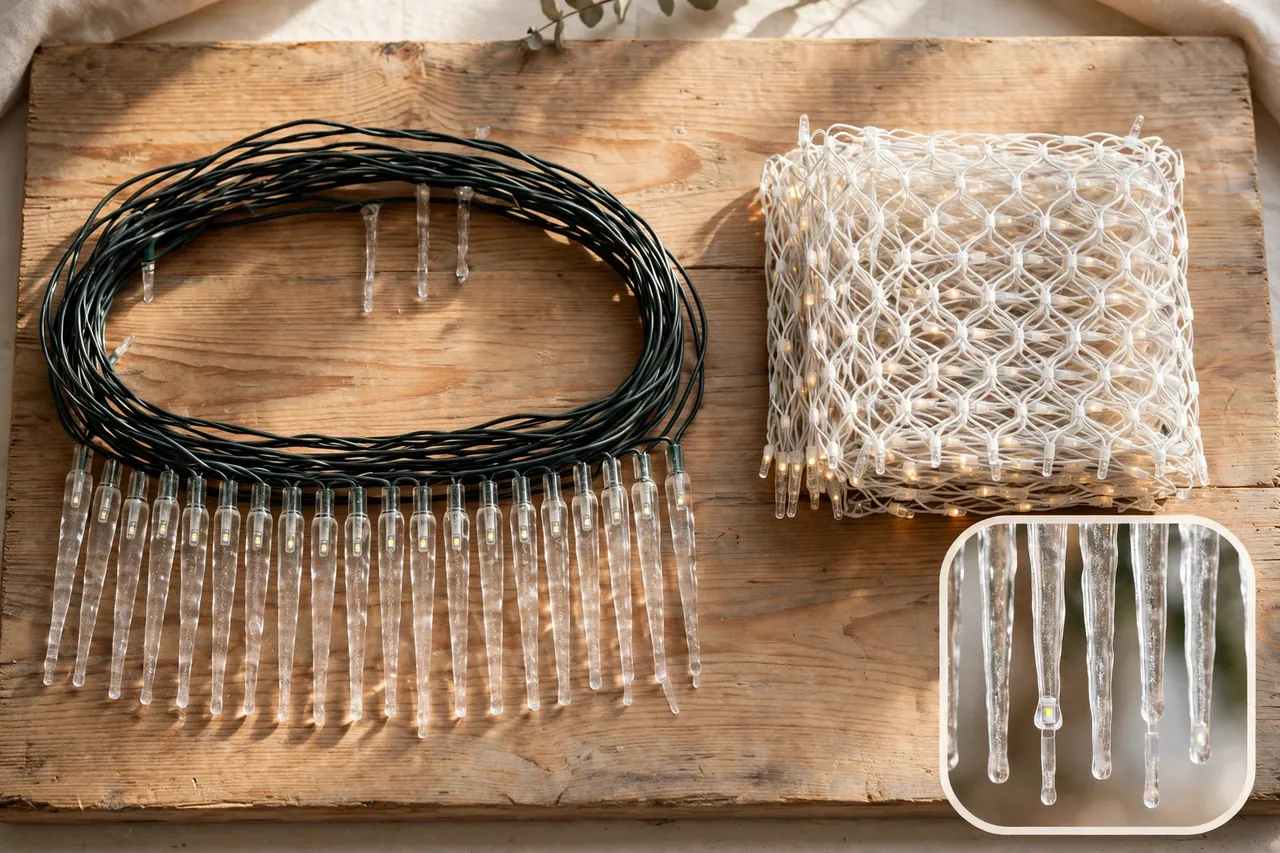
Icicle lights, net lights, and standard string lights do not behave the same way in storage. Treat each type by its shape, and you avoid most snags.
Store Icicle Lights by the Main Wire
Icicle lights hang from one main horizontal wire, with short drops dangling below it. Wind that main wire around a reel or a wide cardboard board, and let the drops hang free alongside it. Never wind each drop separately, and never force the drops into tight circles. The best way to store icicle lights keeps the drops aligned and untangled, so they fall straight when you hang them again.
Secure the bundle with one soft tie near the bottom of the drops, just enough to hold the drops together without crushing them. If your icicle strands differ in drop length or color, label each one. Mixed-up icicle strands make a roofline look uneven next year.
Fold Net Lights Flat Like a Blanket
Net lights form a grid, so rolling them into a ball turns the grid into a snarl. Fold them instead. Lay the net flat, fold it in accordion folds like a fan, and then fold the bundle once more into a flat rectangle. Slip it into its own bag or lay it flat in the bin.
Place a sheet of tissue paper between folded nets if you stack more than one. The paper stops bulbs from catching on the next net’s wires. Label the bag with the net’s size and where it goes, such as the front bushes or the porch railing.
Handle String Lights and Tree Lights With Care
Standard string lights and Christmas tree lights store well on a reel or a flat cardboard winder. The best way to store Christmas tree lights follows the same rule: one strand per winder, labeled with its color, bulb count, and spot on the tree. When you take lights off the tree, wrap them onto the winder as you go, starting from the end farthest from the plug. That habit turns takedown into storage in one smooth pass.
For a fuller look next year, note which strands lit the inner branches and which lit the outer tips. If you want fresh ideas for how you arrange those strands, browse Christmas light ideas for a home that glows all season before you plan next year’s display.
Bulb Care and Spare Bulbs
Bulbs break most often during handling and storage, not during the season. A few simple habits protect them.
First, keep bulbs from pressing hard against each other. Do not pile heavy boxes on a bin full of lights, and do not cram one more reel into a full bin. Pressure cracks covers and snaps bulbs out of sockets.
Second, store spare bulbs where you can actually find them. Keep the maker’s spare bulbs in a small zip-top bag, labeled with the strand they fit. Tape that bag to the matching reel, or drop it into the same bin section as that strand. A spare bulb in a junk drawer helps no one in November.
Third, treat C7 and C9 bulbs with extra care. These larger bulbs carry more weight and more leverage, so they snap off more easily than mini bulbs. If you run a stringer-and-bulb system, where you screw separate bulbs into an empty string, you can remove the bulbs before you wind the string. That extra step takes time, but it removes the most common storage damage for these systems.
Store removed bulbs in their original packaging when you still have it, or in a divided container such as a tackle box. Sort them by color and type, and label each section. Specialty bulbs cost more and prove harder to replace mid-season, so they deserve the best protection.
Finally, wipe dusty or dirty bulbs with a dry cloth before you pack them. Outdoor strands may carry dirt or moisture from rain and snow. Let damp strands dry fully at room temperature before you wind them. Trapped moisture corrodes sockets and dulls connections over the months in storage.
Pack and Label Your Christmas Light Storage Bin
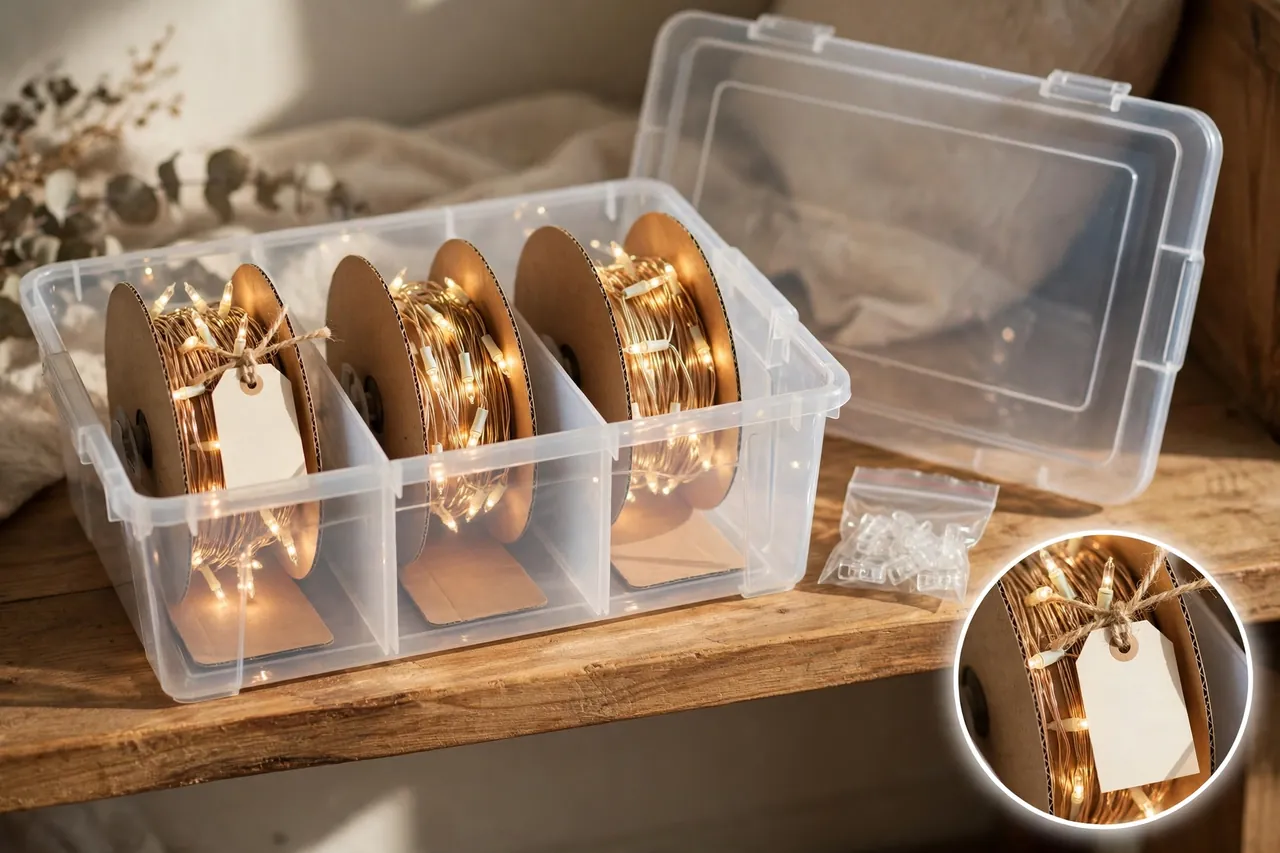
A good Christmas light storage bin does three jobs: it keeps strands apart, keeps moisture and pests out, and tells you what sits inside without opening it.
Choose a rigid plastic bin with a tight-fitting lid. A rigid bin protects bulbs from crushing, and a lid keeps out dust, damp air, and mice. Mice love to nest in coiled wire, and they chew insulation. If mice visit your storage area, pick a bin with a snapping lid and store it off the floor on a shelf.
Pack each strand in its own spot. Use one reel, one cardboard winder, or one labeled bag per strand. Smaller bins beat one giant bin here. A giant bin grows heavy, crushes the strands at the bottom, and forces you to dig through everything to reach one strand.
Keep the matching accessories with the matching lights. Put light clips, extension cords, and timers in small bags, and drop each bag into the same bin section as its strand. You will thank yourself when you hang lights again and every clip sits right where you need it. If you run your display on a plug-in timer, keep it with the outdoor strands, and review how to use a timer plug before next season so setup stays simple.
Label everything, on the reel and on the bin. A useful label names the color, bulb type, length or bulb count, and location, for example “Front porch, warm white LEDs, 100 bulbs.” Write labels on tape or tags, not straight onto cardboard winders, because ink can bleed and weaken cardboard over time. Add the year you stored the strand if you rotate older sets out.
For a large display, keep one master list on top of the bin or taped inside the lid. List each strand, its bin, and its location in the yard or house. That list turns next year’s setup from a treasure hunt into a checklist.
Where to Store Christmas Lights
Where you store lights matters as much as how you wrap them. Heat, moisture, sunlight, and pests all age wire and bulbs while you wait for next December.
The best spot stays cool, dry, and steady all year: an interior closet, a shelf in a climate-controlled garage, or a dry basement shelf. Keep bins off the floor, because garage and basement floors can get wet. A shelf or wall hook keeps your lights above any small leak or spill.
Can you store Christmas lights in the attic? You can, but a hot attic makes a poor home for them. Attics in warm climates regularly pass 130 degrees Fahrenheit in summer, and that sustained heat breaks down wire insulation and fades colored plastic lenses over time. If the attic stands as your only option, use insulated containers, keep bins away from the roof deck, and check each strand closely each fall for cracked or discolored insulation.
Skip damp sheds, unheated outbuildings, and any spot with direct sunlight. Sunlight degrades colored lenses and wire coatings, and damp air corrodes sockets. An opaque bin helps, because clear bins let light reach the strands inside. Toss a silica gel packet into each bin if your storage area runs humid, and replace damp packets before they soak through.
Keep lights away from sharp tools, heavy boxes, and anything that can crush or cut them. Store bins where no one stacks holiday boxes on top of them. A crushed bin still looks fine from outside, but the bulbs inside may not survive the weight.
What Ruins Lights in Storage
Most storage damage comes from a short list of avoidable mistakes. Check your habits against this list before you close the bin lid.
- Tossing strands loose into a box, where plugs catch and wires weave into knots.
- Mixing several strands in one bag or bin section, so they tangle together.
- Wrapping wire too tight around a narrow core, which kinks insulation and stresses sockets.
- Storing damp strands, which corrode sockets and dull connections over months.
- Leaving lights in attic heat, which breaks down insulation and fades lenses.
- Stacking heavy boxes on light bins, which cracks bulbs and crushes coils.
- Using rubber bands or bare wire ties, which snap, stick, or cut into insulation.
- Storing damaged strands for reuse, which wastes a bin slot and risks a safety problem.
- Skipping labels, which turns next year’s setup into guesswork.
Fix any one of these habits, and your lights last longer. Fix all of them, and you may never buy a replacement strand because storage ruined the old one.
If you want to skip takedown and storage altogether for your roofline, look at permanent outdoor Christmas lights. They stay up year-round, so you trade seasonal storage for a different kind of upkeep.
Your Next-Year Setup Checklist
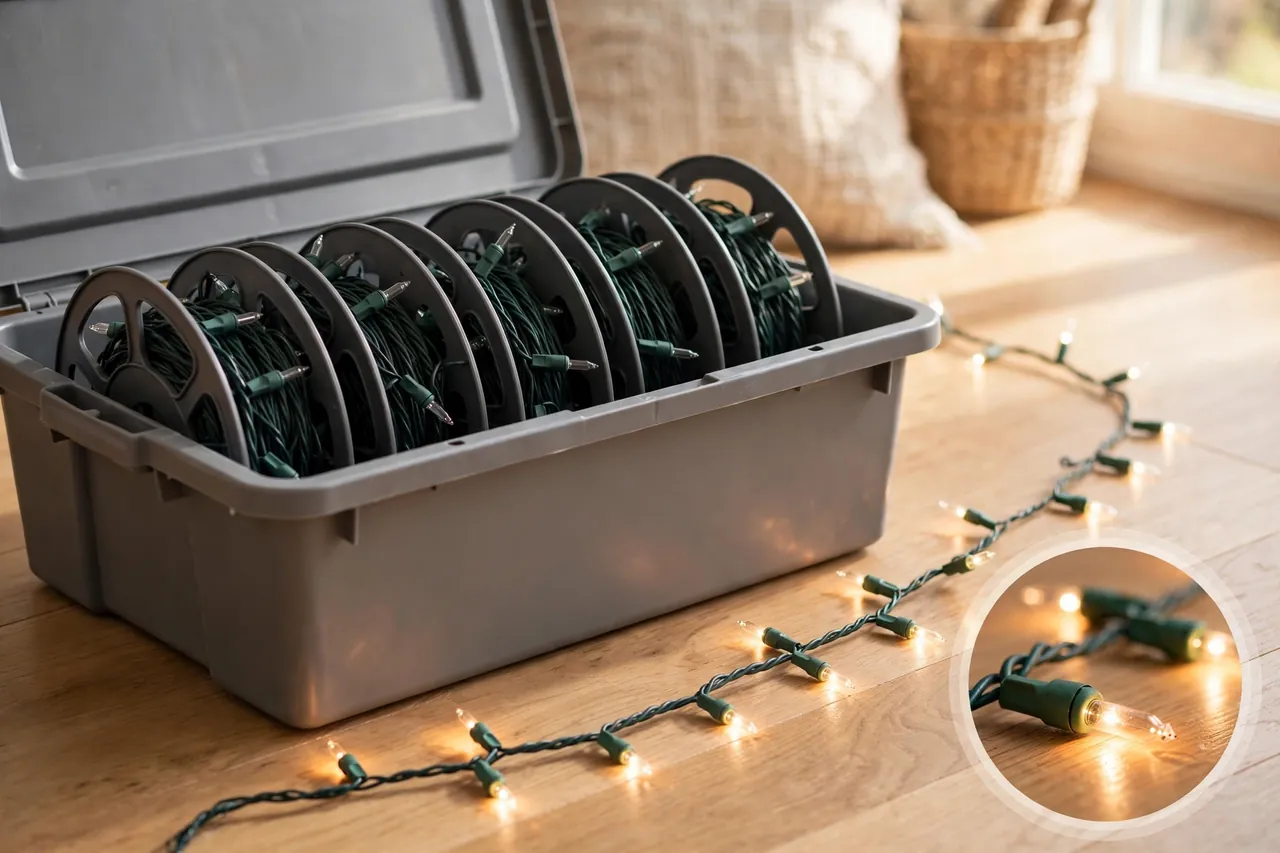
Good storage pays off when you open the bin next year. Use this checklist, and keep a copy inside the bin lid so you follow the same order every season.
- Open one bin at a time, and pull strands in the order you plan to hang them.
- Unwind each strand slowly, and check the label against the spot where it goes.
- Plug in each strand and test it before you climb a ladder or hang a single clip.
- Replace any dead bulbs with the matching spares from the same bin section.
- Hang the strand, then move to the next label, and repeat until the display glows.
- Note any strand that flickers, dims, or fails, and retire it at takedown instead of storing it again.
- When the season ends, start this guide again from the top, and your lights stay ready year after year.
Take a quick photo of your finished display before takedown, and tuck a print or a note about it into the bin. That photo shows you exactly where each strand went, and it makes next year’s layout a copy job instead of a fresh puzzle.
If your display runs on an automatic schedule, test the timer while you test the lights. A timer that worked last year may need fresh settings or new batteries. Read how an automatic light switch timer works if you plan to change how your lights switch on and off next year.
Related Guides
Christmas Ornament Storage Box: How to Keep Every Ornament Safe Until Next Year · Christmas Hanging Decorations: Ideas and Damage-Free Ways to Hang Them
- Christmas Light Ideas for a Home That Glows All Season
- Permanent Outdoor Christmas Lights: Real Costs, DIY vs Pro Install, and Year-Round Use
- Tree Decorating Ideas for Christmas
- Decorating a Christmas Window: Ideas That Glow Inside and Out
- Themes for Christmas Decoration: 10 Whole-Home Looks That Actually Work
- How to Use a Timer Plug: A Beginner’s Step-by-Step Guide
- Automatic Light Switch Timer: A Simple Guide to Timers That Run Your Lights
Frequently Asked Questions
What’s the best way to store Christmas lights so they don’t tangle?
Wind each strand on its own around a cardboard reel or a purpose-built plastic light reel. Never wad lights into a loose bundle or store multiple strands loose in the same container. Secure the end with a twist tie, store each reel flat, and label it before you pack it away.
Can I store Christmas lights in the attic?
You can, but a hot attic shortens their life. Attics in warm climates regularly exceed 130 to 140 degrees Fahrenheit in summer, which degrades wire insulation and colored plastic lenses over time. A climate-controlled garage or an interior closet serves you better, and an insulated container helps if the attic is your only option.
How do I test Christmas lights before storing them?
Plug in each strand after takedown, before you wind it for storage. Walk the full length and check for dead bulbs, flickering sections, or damaged sockets. Mark any issues with masking tape so you can repair or replace the strand before next season, when a fix takes far less effort.
Should I remove bulbs from stringers before storing?
For stringer-and-bulb systems such as C7 and C9, removing bulbs before storage prevents the most common damage: bulbs snapping off or getting crushed during handling. Store the bulbs in compartmentalized containers or their original packaging, separated by color and type, and label each section.
What is the best way to store Christmas tree lights after the season?
Wrap each strand around a piece of flat cardboard or a dedicated cord spool rather than loosely bundling it. Store the wrapped strands in a cool, dry location away from direct sunlight. This single habit decides whether your tree strands survive many seasons without tangling or developing dead sections.
A Small Effort Now, a Smooth Start Next Year
Storing Christmas lights well takes a little extra time on takedown day, and it pays you back every November. Test each strand, wrap it on its own winder, label it clearly, and pack it in a cool, dry bin. Next year, you will open that bin, unwind each strand, and hang your display instead of fighting knots.
Start with one strand today, even if you store the rest tomorrow. Once you feel how smoothly a well-wrapped strand unwinds, you will never toss lights loose into a box again.
Electrical safety note: always unplug lights before you handle, test, or store them. Check every strand for damaged wires, cracked sockets, and frayed insulation before storage, and never store a damaged string for reuse. If a strand shows damage you cannot fix with a matching replacement bulb, retire it and recycle it through a local e-waste or hardware-store drop-off program where available.