A good Christmas ornament storage box keeps each ornament in its own padded compartment, stops pieces from knocking together, and sits in a cool, dry spot inside your home. That simple setup prevents most broken ornaments, and it also makes decorating next year much faster. You do not need the fanciest box on the shelf. You need the right size, the right dividers, and a storage spot that stays steady all year.
Think of it this way: ornaments break in storage for only a few reasons. They bump each other, something heavy crushes them, heat or damp weakens them, or pests get into a weak box. A divided box with a snug lid solves the first two problems. A closet or another climate-controlled spot solves the rest. This guide walks you through box types, what fits what, how to wrap and layer ornaments, and where to store the finished boxes.
What a Christmas Ornament Storage Box Actually Does
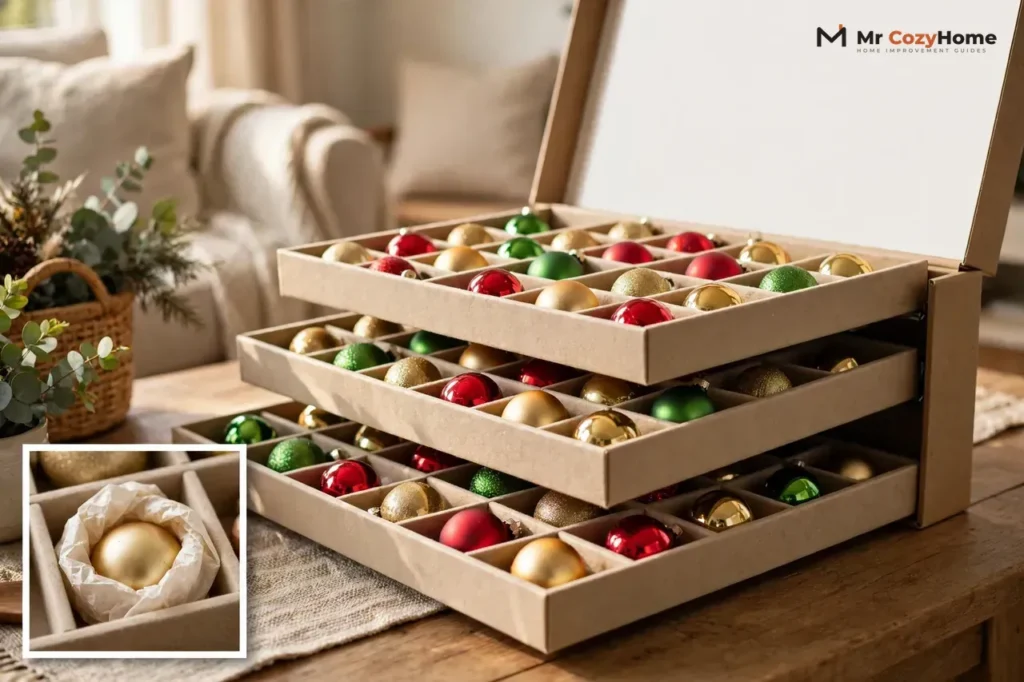
An ornament storage box gives every ornament its own little home for eleven months. Dividers or trays keep glass balls from rolling into each other. A rigid shell stops a stack of boxes from squashing the ornaments inside. A lid keeps dust, moisture, and curious mice out.
Most boxes use one of two layouts. Some hold stacked trays that lift out one at a time, so you can decorate tray by tray. Others hold a single layer of cardboard or plastic dividers inside a bin. Both layouts work well. Trays suit large collections, because you can pull out one color or theme at a time. Single-layer boxes suit small collections and tight shelves.
Before you buy anything, count your ornaments and sort them by size. Count the big, fragile pieces first, because they drive the box size. Then count the standard balls, and finally the tiny or mini ornaments. A box that fits your biggest ornament with room to spare beats a box that holds a big number but squeezes everything tight.
Box Types Compared: Divided Trays, Adjustable Dividers, and Hard vs Soft Cases
Shoppers face a lot of choices, so start with the shape of your collection, not the prettiest box. The table below sums up the main options in plain terms.
| Box type | Best for | Watch out for |
|---|---|---|
| Divided trays that stack | Large collections sorted by color or theme | Deep stacks get heavy, so lift trays one at a time |
| Adjustable dividers | Odd shapes, tall figurines, and mixed sizes | Loose dividers can slide, so check the fit before you pack |
| Hard plastic case | Glass, heirlooms, and boxes that travel or stack | Sealed plastic can trap damp, so add a moisture absorber |
| Soft fabric case | Shatterproof ornaments and light, easy carrying | Soft sides offer little crush protection |
| Original ornament boxes | Collector pieces and odd shapes made for that box | Old cardboard weakens, so store it inside a sturdier bin |
Divided Trays
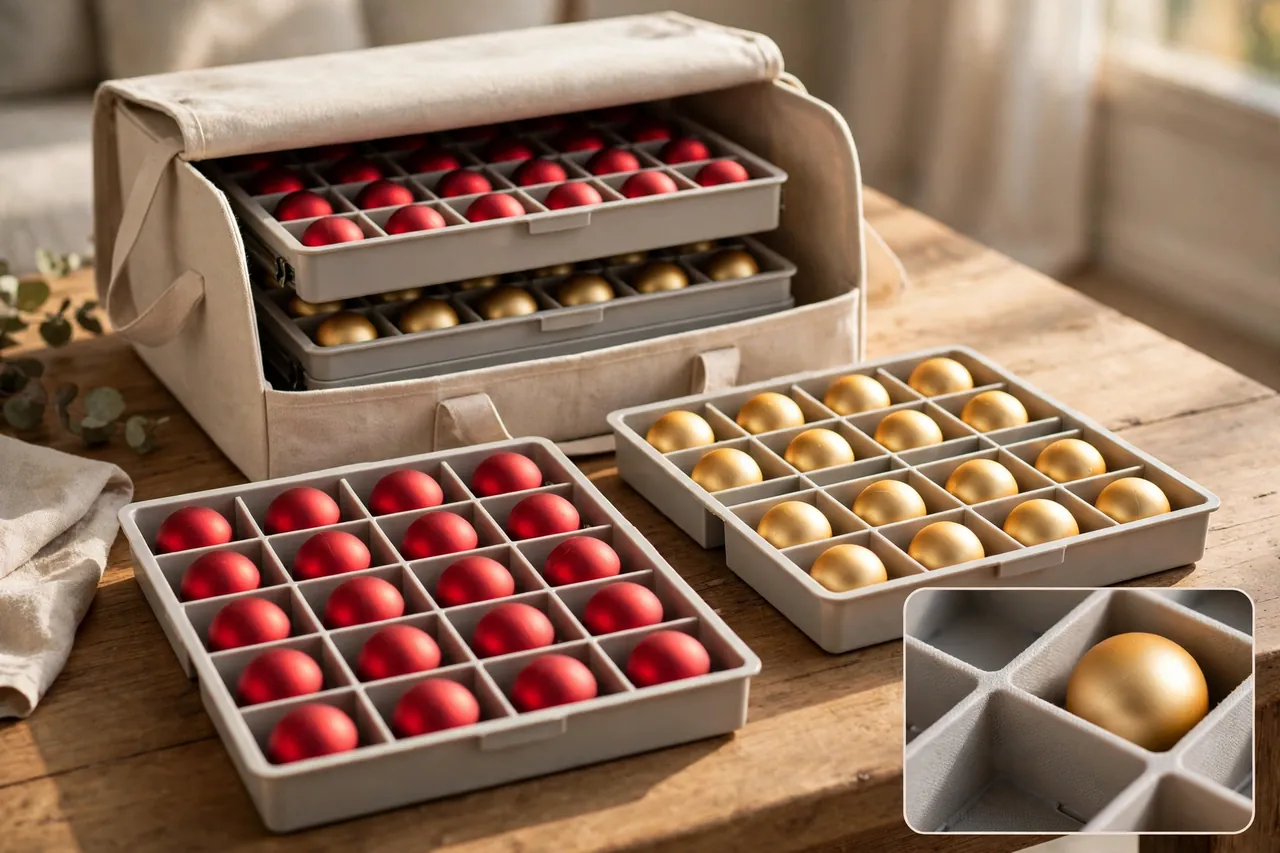
Divided trays work like a drawer for ornaments. Each tray holds one layer, and you stack the trays inside a case or bin. This layout shines when you sort by theme, because you can label each tray and pull out only what you need. For example, you can keep red balls on one tray, gold balls on another, and keepsakes on a third.
Keep each tray light enough to lift with one hand. Heavy trays bend, and a bent tray can press down on the ornaments below it. If a tray feels heavy, split it into two trays instead of forcing the lid shut.
Adjustable Dividers
Adjustable dividers let you change the size of each compartment, so one box can hold fat balls, slim icicles, and tall figurines at the same time. Move the dividers until each ornament sits snug without touching its neighbor. Snug matters: an ornament that rattles around will chip, and an ornament squeezed tight can crack under pressure.
Ornament storage boxes with dividers also help with tree decorating ideas for Christmas, because you can pack each tray in the order you hang things. Pack the ornaments you hang first on top, and the finishing pieces at the bottom, so unpacking feels like following a plan instead of digging through a jumble.
Hard Cases vs Soft Cases
Hard plastic cases protect glass and heirloom ornaments best. Rigid walls resist crushing when you stack boxes, and a tight lid blocks dust and pests. Choose a hard case for anything you could not replace, and for any box that rides in a car or sits under other boxes.
Soft fabric cases suit shatterproof ornaments, felt pieces, and plush ornaments. They weigh less, fold flat when empty, and often cost less. However, soft sides will not save a glass ball if a heavy box lands on top, so never stack heavy bins on a soft case. If you own both types, put the hard cases on the bottom of the stack and the soft cases on top.
What Fits What: Shatterproof, Glass, Heirloom, and Oversized Ornaments
Match the protection to the ornament, not the other way around. Shatterproof plastic ornaments can share a divided tray with just tissue between them. Glass ornaments need their own compartment and a wrap. Heirlooms need the full treatment: a wrap, a compartment, a rigid box, and a safe spot indoors.
Shatterproof Ornaments
Shatterproof ornaments forgive a lot. You can group them by color in shallow trays or divided bins, and you can stack trays without much worry. Still, give each ornament its own cell when you can. Glitter and paint rub off when pieces grind together all year, and a scuffed finish shows up fast under tree lights.
Glass and Heirloom Ornaments
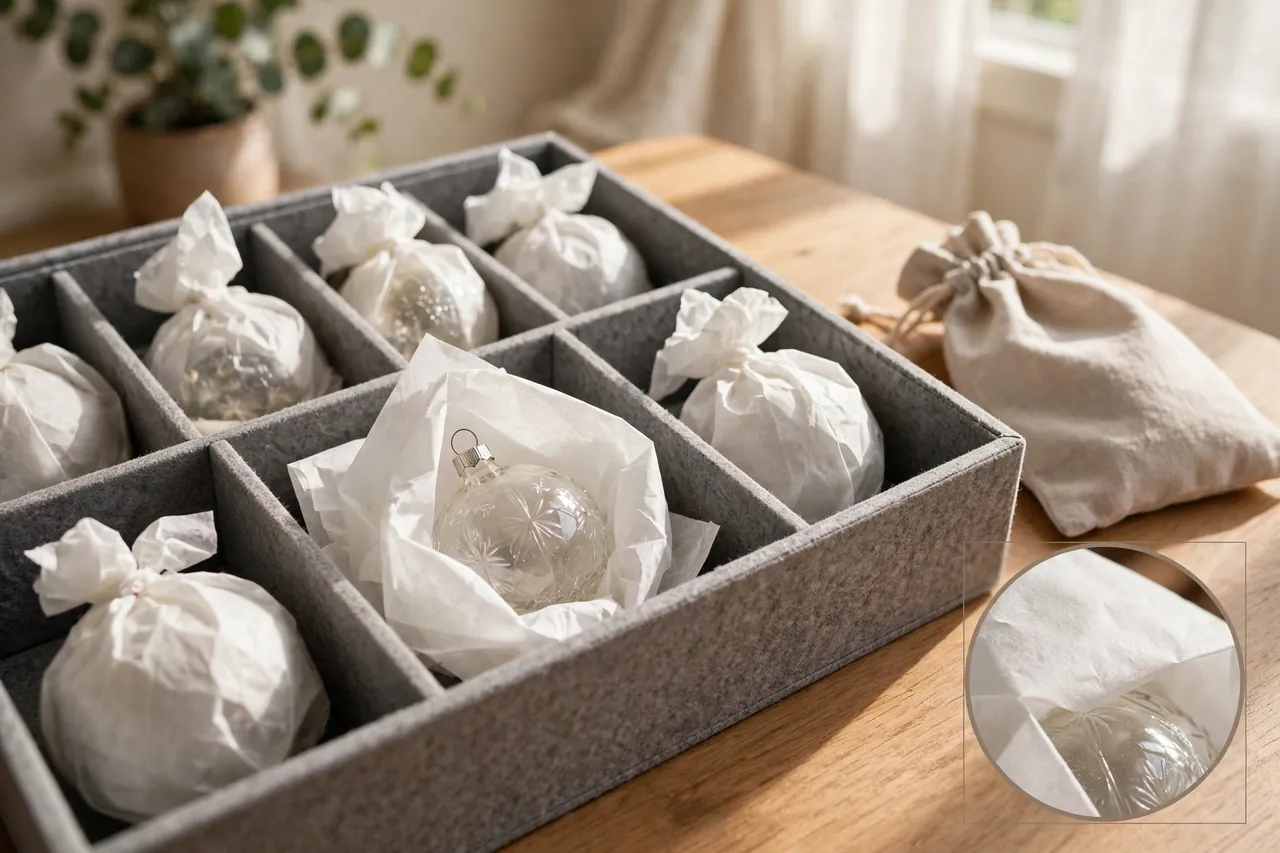
Glass ornaments break from small knocks, not just big drops. Wrap each one on its own in acid-free tissue paper, then set it in its own compartment. Acid-free tissue matters because regular newspaper ink can transfer onto ornaments, and colored paper can stain them. For extra-delicate pieces, add a second wrap of tissue or a soft cloth pouch before you set the ornament in the box.
Heirlooms deserve one more step: a label on the outside of the wrap. Write the name or story in pencil on the tissue or on a small paper tag, such as “Grandma’s glass dove.” Never stick an adhesive label right on the ornament itself, because the glue can damage paint and finish. Keep heirlooms in their original boxes when you still have them, and store those original boxes inside a rigid bin for extra protection.
Oversized Ornaments, Toppers, and Figurines
Large ornament storage needs a different plan. Oversized balls, long icicles, nutcrackers, and tree toppers rarely fit standard trays, and forcing them in breaks points, wings, and hooks. Give each large piece its own space with adjustable dividers, or pack it in its own small box lined with tissue and then set that box inside a larger bin.
For tall figurines, use a box tall enough that the lid closes without pressing down. If a piece stands too tall, lay it on its side with tissue padding around every sticking-out part, and mark the box “this side up” only if you truly keep it that way. Fill every gap with crumpled tissue so nothing shifts when you carry the box.
Small or mini ornaments need the opposite trick: tiny compartments so they do not vanish into big cells. Egg cartons work well for mini ornaments, and so do small divided craft boxes. Wrap each mini ornament, set one per well, and secure the carton with a rubber band before you slide it into a larger box.
How to Wrap and Layer Ornaments Step by Step
Packing well takes a little time once a year, and it saves you from opening a box of broken pieces next December. Follow these steps in order, and work on a soft surface like a towel so a slipped ornament lands safely.
- Clean each ornament first. Dust it gently with a soft microfiber cloth, and skip water or sprays unless you know the material can handle them.
- Check each ornament for cracks, loose caps, and wobbly hooks. Fix loose caps now, while you still remember which piece needs help.
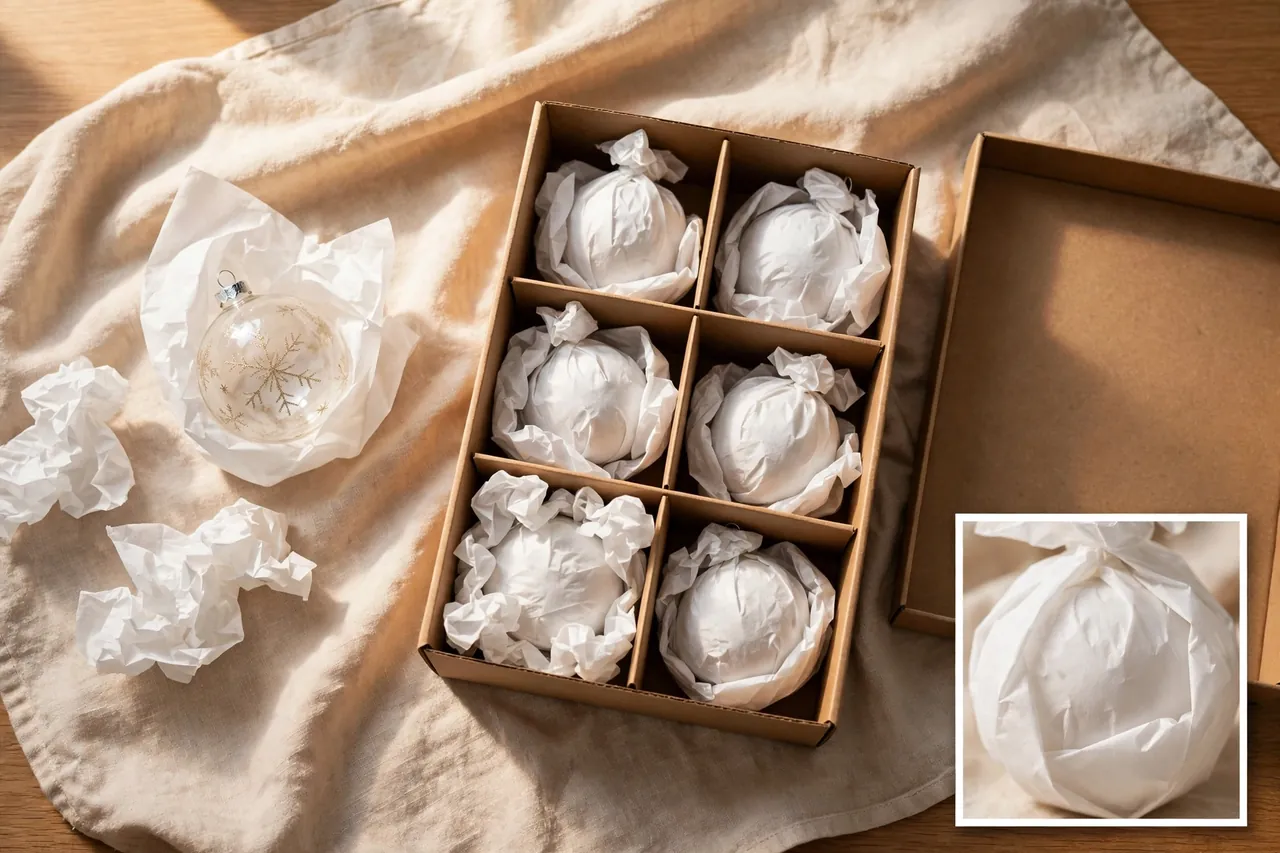
- Wrap each fragile ornament on its own in acid-free tissue paper. Fold the tissue around it so no bare surface shows.
- Remove hooks, or tuck them inside the wrap, so hooks cannot scratch the ornament next door.
- Set one ornament per compartment. Never stack unwrapped ornaments on top of each other.
- Fill empty gaps with crumpled tissue paper so nothing slides when you move the box.
- Put heavier ornaments on the bottom layer and lighter, delicate pieces on top.
- Close the lid without forcing it. If the lid bulges, take something out and repack.
Layering matters as much as wrapping. A single layer of ornaments with tissue on top beats two layers crammed into one tray. If you must stack trays, place a sheet of tissue or thin foam between layers, and keep the heaviest tray at the bottom. Think about the box as a whole: a box you can lift with ease is a box you are less likely to drop.
Labeling So Next December Feels Easy
Label every box on the outside, on at least two sides, so you can read it without turning a heavy stack around. Skip vague labels like “Christmas stuff.” Write what actually sits inside, such as “Glass ornaments, red and gold” or “Heirlooms, fragile.” Specific labels save you from opening five boxes to find one set.
Label trays too, when your box uses them. A small paper tag on each tray turns decorating into a quick job: pull the tray you need, hang those ornaments, and move on. If you sort by theme, your labels double as your decorating plan. For instance, a tray labeled for a theme from your themes for Christmas decoration guide can go straight from the box to the tree.
Take a quick photo of each finished tray before you close the lid. Next year, you can check the photo instead of unwrapping everything to find one ornament. Store the photos in a holiday folder on your phone, and you will thank yourself when decorating day arrives.
Where to Store Ornament Boxes
The best storage spot stays cool, dry, and steady all year. Interior closets rank first for most homes, because they stay close to room temperature and away from damp floors. The top of a closet, a spare-room cabinet, or under-bed storage all beat an attic or a damp basement for fragile pieces.
University of Delaware art conservation experts give the same advice: store holiday pieces in a cool, dry, climate-controlled space away from direct sunlight and heat sources, and avoid attics and basements when you can, because humidity and temperature swings can cause damage. That guidance fits ornaments especially well, since glass, paint, glue, and metal caps all react to swings in heat and moisture.
Why Attic Heat Hurts Ornaments
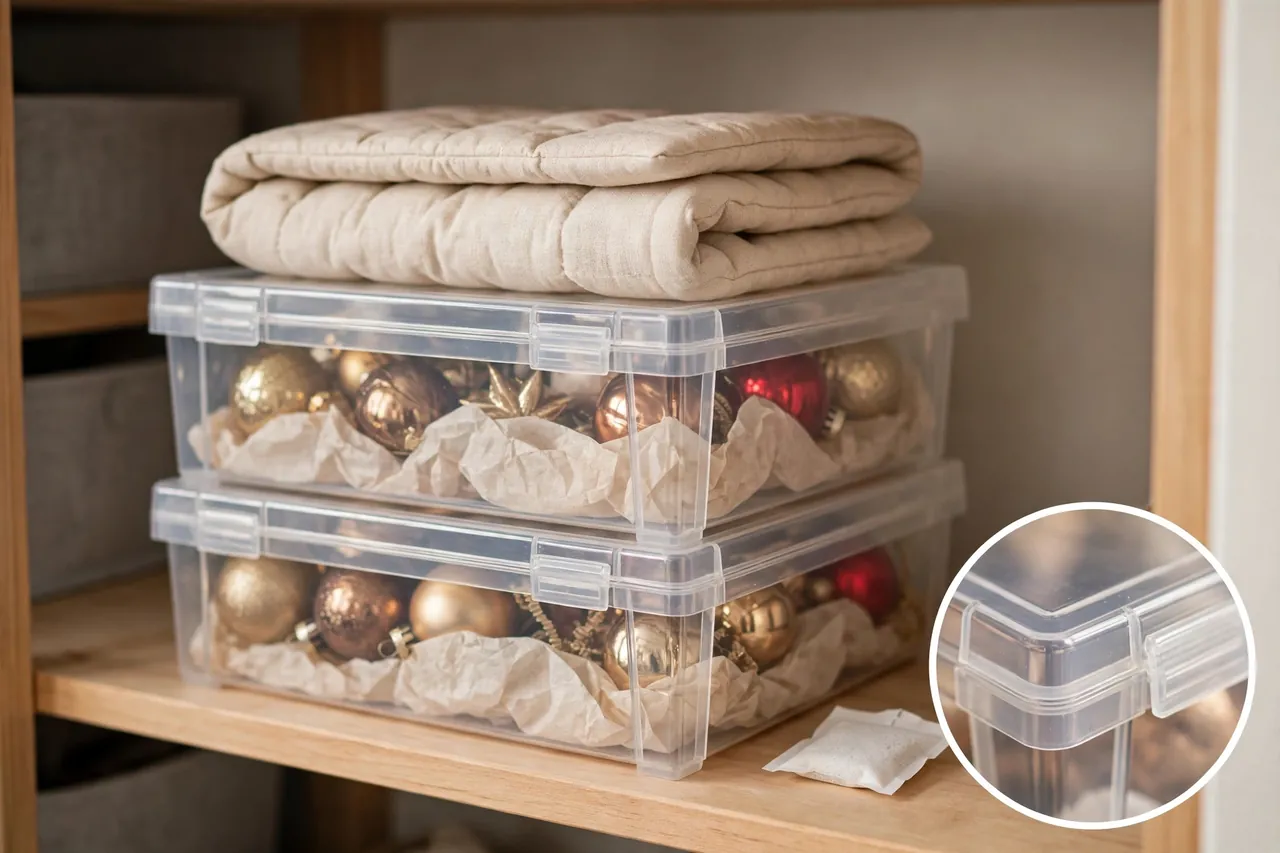
Attics get very hot in summer and cold in winter, and that swing stresses ornaments again and again. Heat can crack glass, soften glue, fade colors, and warp wood or plastic. Sunlight through a vent or window fades finishes even faster. If the attic is your only option, choose a hard, lidded plastic box, add silica gel packs to absorb moisture, and keep heirlooms out of the attic entirely.
Why Damp Basements Hurt Ornaments
Basements bring the opposite problem: damp air, musty smells, and the risk of a leak or flood. Moisture makes paint peel, metal caps rust, and cardboard boxes sag and grow mold. Pests also love quiet cardboard boxes that sit untouched for months. If you must use a basement, raise boxes off the floor on a shelf or pallet, use sealed plastic bins instead of cardboard, and check the spot twice a year for dampness, leaks, or droppings.
Garages sit in the middle: they swing with the weather, invite pests, and often stack heavy gear on top of holiday boxes. Keep ornament boxes off garage floors, away from car fumes and chemicals, and never under heavy tools or paint cans. When you can, move the ornament boxes indoors and leave only the toughest, least precious decor in the garage.
What Damages Ornaments in Storage
Most storage damage comes from five culprits, and each one has a simple fix.
- Knocks and crushing: ornaments touch each other or heavy boxes sit on top. Fix it with dividers, one ornament per cell, and hard cases on the bottom of the stack.
- Heat: attic sun and nearby heaters crack glass and fade paint. Fix it with an indoor, climate-controlled spot.
- Damp: basement moisture peels paint, rusts caps, and grows mold. Fix it with sealed bins, silica gel packs, and boxes raised off the floor.
- Sunlight: direct sun fades colors and weakens materials. Fix it with opaque boxes stored away from windows.
- Pests: mice and insects chew cardboard and nest in soft materials. Fix it with hard plastic bins, tight lids, and a quick check twice a year.
Check your boxes once in spring and once before the holidays. Look for damp spots, droppings, musty smells, and cracked tissue. Replace silica gel packs each year, because used packs stop absorbing moisture. A five-minute check catches a small leak before it ruins a whole collection.
DIY Ornament Storage vs Bought Boxes
You do not need to buy a full system to store ornaments well. A do-it-yourself box can protect a small collection just as well as a store-bought one, as long as you follow the same rules: one ornament per cell, padding in every gap, and a rigid outer box.
DIY Options That Work
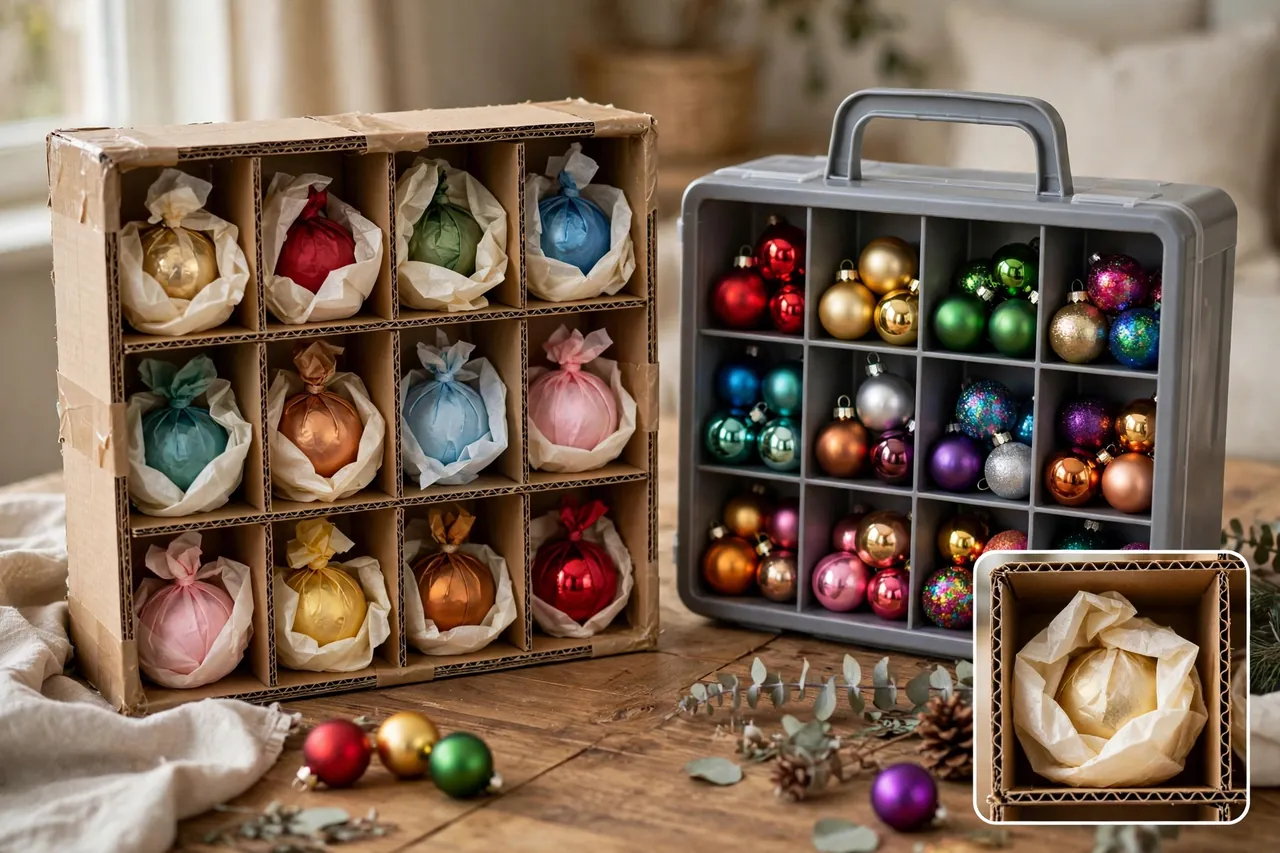
Cut cardboard strips into a grid and slide the grid into a sturdy box to make your own dividers. Wrap each ornament in tissue, set one per cell, and fill gaps with crumpled tissue. Glassware moving boxes already come with dividers, and they make excellent ornament boxes at a low cost. Egg cartons handle mini ornaments, and small gift boxes lined with tissue protect odd shapes before they go into a larger bin.
DIY boxes suit small collections, tight budgets, and odd-shaped pieces. They also let you size each cell exactly to the ornament you own. The trade-off is time: cutting dividers and wrapping each piece takes longer than dropping ornaments into ready-made trays.
When a Bought Box Wins
Buy a proper ornament storage box with dividers when your collection grows past a few dozen pieces, when you own a lot of glass, or when you stack boxes high. Ready-made trays save time, stack neatly, and often include handles and clear windows so you can see what sits inside without opening every box. Large ornament storage containers also help when you own oversized pieces, because their deep cells and adjustable dividers handle sizes that a homemade grid struggles with.
A smart middle path works for many homes: buy divided boxes for glass and heirlooms, and use DIY boxes for shatterproof ornaments and sturdy extras. Spend your money where breakage hurts most, and save it where it does not. If you hang a flocked tree, read up on what a flocked Christmas tree is before you pack, because flocking sheds and sticks to ornaments, so a quick wipe before wrapping keeps both the tree look and the ornaments clean next year.
Quick Checklist Before You Close the Lid
Run through this list for every box, and you will catch most packing mistakes before they cost you an ornament.
- Each ornament sits in its own compartment, wrapped if fragile.
- No hooks stick out where they can scratch a neighbor.
- Every gap holds crumpled tissue, so nothing slides.
- Heavy ornaments sit on the bottom, light ones on top.
- The lid closes flat without force.
- The outside label names the contents and says “fragile” when needed.
- The box goes to a cool, dry indoor spot, off the floor.
Related Guides
If you want the whole tree to look its best next year, start with tree decorating ideas for Christmas to plan your look, then use themes for Christmas decoration to pick one style for the whole home. Add ribbon with how to put ribbon on a Christmas tree, and check what a flocked Christmas tree is if your tree sheds flocking onto your ornaments.
Frequently Asked Questions
What is the best way to store Christmas ornaments to prevent damage?
Wrap each fragile ornament on its own in acid-free tissue paper, set one ornament per compartment in a divided box, and store the box in a cool, dry, climate-controlled spot like a closet. Skip attics and garages for glass and heirlooms, because heat swings and damp air cause most long-term damage.
How do you store Christmas ornaments after the holidays?
Take ornaments down gently, dust each one with a soft cloth, and wrap fragile pieces in tissue before they go into a divided box. Put heavier ornaments on the bottom, fill gaps with tissue, label the box by contents, and store it indoors off the floor.
How can I store special ornaments to keep them safe?
Keep special ornaments in their original packaging when you have it, or wrap each one in acid-free tissue and place it in a rigid, sectioned box. Label the wrap in pencil, never with a sticky label on the ornament, and store the box in a closet rather than an attic or basement.
How do I store tree toppers and figurines?
Give toppers and figurines their own space with adjustable dividers, or pack each one in its own tissue-lined small box inside a larger bin. Use a box tall enough for the lid to close without pressing down, and pad every wing, point, and hook so nothing snaps in transit.
Can I store ornaments in the attic or basement?
You can, but fragile ornaments fare much worse there. Attics bake in summer and freeze in winter, while basements bring damp air and mold risk. If you have no indoor space, use sealed hard plastic bins, add silica gel packs, raise boxes off the floor, and keep heirlooms in a closet instead.
Good ornament storage is not about buying the biggest box. It is about giving each ornament its own safe cell, keeping the box in a steady indoor spot, and labeling it so next December starts with joy instead of a repair job. Pack with care this year, and your ornaments, including the ones that carry family memories, will come back just as bright next Christmas.