To put ribbon on a Christmas tree, start with wired ribbon, put your lights on first, then work from the top of the tree down in loose loops or a gentle spiral, tucking the ribbon into the branches and securing it with short pieces of floral wire every few loops. Add your ornaments last, so they sit on top of the ribbon instead of hiding under it. That order — lights, ribbon, ornaments — is the whole secret, and it works whether you want a simple cascade or a tree covered in bows.
💡 Practical Home Tip: Do the ribbon in daylight, or with the room lights on and the tree lights off. You will see the shape of the loops clearly, and you will spot thin or crowded spots before the ornaments go on and hide them.
If you have ever watched someone decorate a tree and thought, “Why does theirs look like a store window and mine looks like I dropped a spool?”, the difference is almost never talent. It is ribbon choice, a simple method, and ends that stay put. This guide walks you through all three, step by step, so your tree looks deliberate instead of accidental.
Start With the Right Ribbon
The ribbon you choose decides how hard the rest of the job feels. Pick the wrong one and you will fight sagging loops all afternoon. Pick the right one and the tree practically decorates itself.
Wired Ribbon Is the Beginner’s Best Friend
Wired ribbon has a thin, flexible wire sewn into each edge. That wire is what lets a loop hold its shape instead of collapsing flat against the branches. You can pinch a loop open, bend it toward a bare patch, and it stays there. For a first attempt at decorating a Christmas tree with ribbon, wired ribbon is the easy, forgiving choice.
Non-wired ribbon feels softer and drapes more naturally, and it can look lovely on a small tree or a loose, woodland style. However, it needs far more clips and floral wire to stay in place, and on a tree taller than about five feet it tends to sag within hours. If you love a non-wired ribbon, use it as an accent — a few bows or short trails — and let wired ribbon do the main work.
Pick a Material That Matches Your Tree
Satin gives a smooth, shiny finish and suits a classic or glamorous tree. Velvet feels thick and rich, and it adds warmth to a traditional red-and-green scheme, although its thickness makes tight knots harder to tie. Burlap and linen bring a rustic, farmhouse feel, while sheer or mesh ribbon looks light and airy and layers beautifully over a solid ribbon. A Christmas tree with mesh and ribbon together — a wide solid ribbon with a narrower mesh ribbon laid over it — is one of the simplest ways to add depth without adding clutter.
Color follows the same rule as everything else on the tree: pick one or two colors that already appear in your ornaments. A Christmas tree with red ribbon and gold ornaments is a classic for a reason. A white Christmas tree with ribbon in silver or champagne looks calm and elegant. If your ornaments are a cheerful mix, a simple gold or deep green ribbon ties them together without competing.
Match the Width to the Tree
Width matters more than most people expect. A ribbon that is too narrow disappears among the branches, and one that is too wide swallows a small tree whole.
Table: Ribbon width by tree size
| Tree size | Ribbon width that works | Why |
|---|---|---|
| Tabletop or under 4 feet | 1.5 to 2.5 inches | Narrow ribbon suits small branches and does not overwhelm the tree. |
| Standard 6 to 7.5 feet | 2.5 to 4 inches | Wide enough to read from across the room, easy to shape into loops. |
| Tall 8 feet and up | 4 to 5 inches | Big trees need bold ribbon, or the ribbon vanishes into the foliage. |
When you shop, check that the wire runs along both edges, not just one. Double-edged wired ribbon holds its shape far better, especially on long cascades. And keep the roll uncut until you start: you will use far less ribbon, and make far fewer mistakes, when you work from the roll instead of pre-cutting lengths you have to join later.
How Much Ribbon Do You Need?
This is the question that sends most people back to the store halfway through decorating. The honest answer is that it depends on your method and how full you want the tree to look, but a simple rule of thumb covers most trees: plan on 2 to 3 yards of ribbon per foot of tree height for a wrapped or cascading look.
Table: Ribbon length for a single spiral, by tree height
| Tree height | Single spiral | Double spiral or heavy loops |
|---|---|---|
| 4 feet | 10 to 15 yards | 20 to 25 yards |
| 6 feet | 15 to 20 yards | 30 to 40 yards |
| 7.5 feet | 20 to 25 yards | 40 to 50 yards |
| 9 feet | 25 to 30 yards | 50 to 60 yards |
Those figures assume a moderate spiral with slight overlap. If you plan to add a big topper bow or clusters of bows, add 5 to 10 yards more. A single-loop medium bow takes about 1 yard, a three-loop bow about 3 yards, and a large tree-topper bow with tails takes 5 to 7 yards. Slim trees need less, wide full trees eat ribbon fast, and bow-only decorating uses less than wrapping because you cut short pieces instead of running long lengths.
Always buy one spare roll. Running out with one bare side left is the most common ribbon frustration, and leftover ribbon never goes to waste — it wraps gifts beautifully. Before you buy, check the length printed on each roll: the most common roll length is 10 yards, but some designer ribbons run shorter and some solid colors run up to 50 yards.
Get the Tree Ready First
Ribbon goes on after the lights and before the ornaments. Lights first, because you can weave them deep into the branches without tangling the ribbon. Ornaments last, because they sit on top of the ribbon and keep it visible. Putting ribbon on after the ornaments is the single most common reason a tree looks cluttered — the ribbon ends up hiding the very things it should frame.
Fluff the branches first, so the tree looks full from every angle, and check that it stands straight and secure. If the tree sits in a corner, plan to focus the ribbon on the front and sides people actually see. Then gather a short list of supplies:
- Wired ribbon on the roll, plus one spare roll
- Short pieces of floral wire, or green pipe cleaners, for securing
- Sharp scissors, and wire cutters if your ribbon is heavily wired
- A sturdy step stool for the top of the tree
- Optional: thin gloves, because cut wire ends can scratch
Do not use tape or glue on branches. Tape peels off and leaves residue, and glue damages needles. Floral wire twisted around a branch holds cleanly, hides inside the foliage, and comes off without a trace in January.
The Easiest Method: Top-to-Bottom Cascade
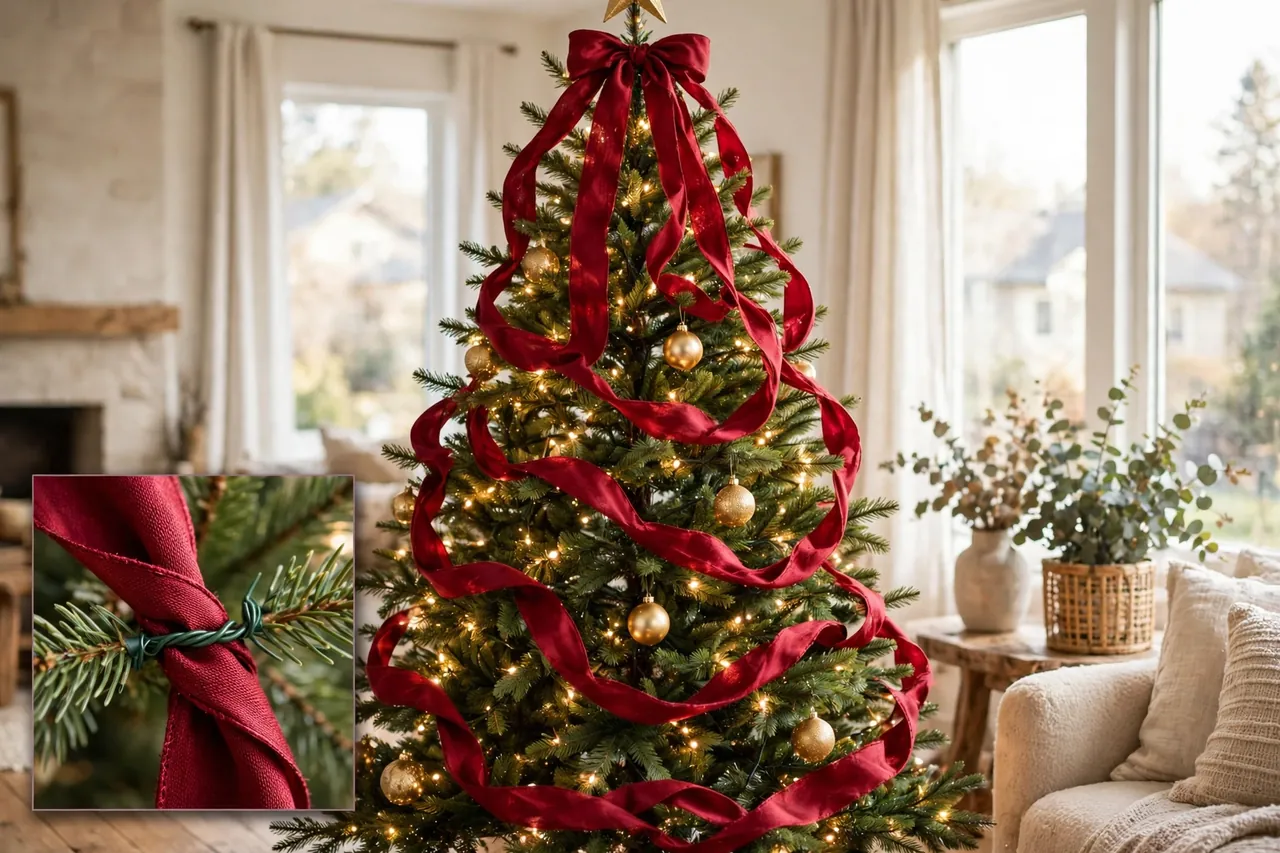
If you are decorating a Christmas tree with ribbon for the first time, start here. The cascade is the most forgiving method there is: the ribbon falls in soft loops from the top to the base, and small mistakes read as natural drape instead of errors.
- Anchor the ribbon at the top. Just below the topper, twist a short piece of floral wire around the ribbon and a sturdy branch near the top. This anchor stops the whole cascade from sliding down as you work.
- Let the ribbon fall in a soft loop. Hold the roll loosely and let about 12 to 18 inches of ribbon drape down and outward, like a relaxed wave. Pinch the wired edges gently so the loop sits open and full rather than flat.
- Tuck the loop into the branches. Every 8 to 12 inches down, push a section of ribbon into a branch fork, or twist a small piece of floral wire around it and the branch. You do not need to wire every inch — just enough that the loop cannot swing free.
- Move down and around. Work your way down the tree in a slow spiral, so the loops spread evenly around all sides instead of stacking up on one face. Step back every few loops and look from a different angle.
- Secure and trim at the base. When you reach the bottom, tuck the ribbon end firmly into a low branch or wire it to one, then cut cleanly with sharp scissors. A small bow at the base makes a tidy finish and hides the cut end.
Repeat the cascade two or three more times around the tree, spacing each run evenly, and you have a finished look. For a fuller tree, run a second ribbon in a different texture — a narrow gold mesh over a wide red satin, for example — following the same path.
The Classic Spiral Wrap
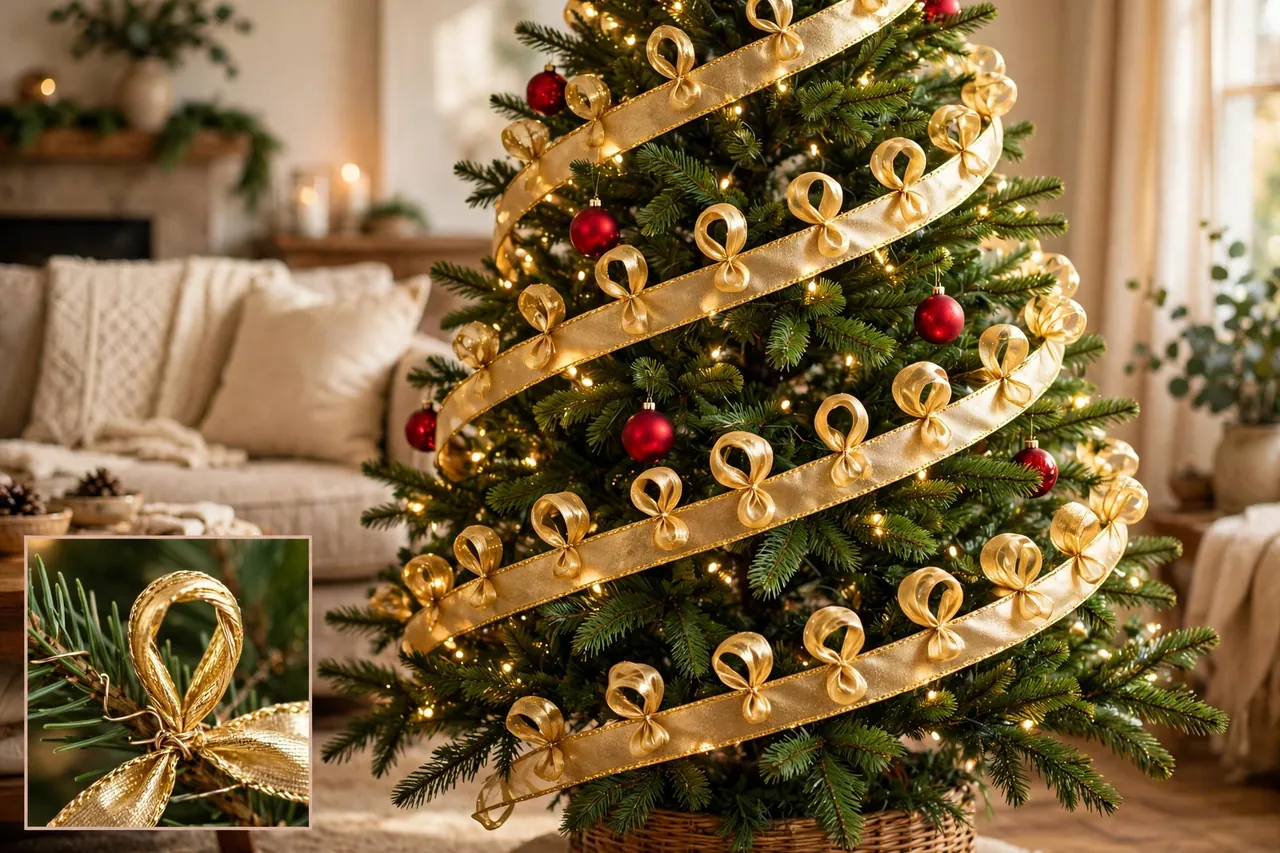
The spiral is the method most people picture when they think of a ribbon-decorated tree: one continuous line winding around the tree like the stripe on a candy cane. It suits wide, lush trees beautifully, and it uses ribbon efficiently because nothing is cut until the end.
- Start at the top back of the tree. Secure the ribbon end to an inner branch with floral wire, so the starting point hides behind the foliage. Beginning at the back means the seam never faces the room.
- Wrap diagonally downward. Guide the ribbon around the tree in a steady diagonal, overlapping each turn slightly. Keep gentle, even tension — pulled taut, the ribbon flattens; left too loose, it sags.
- Pull small loops outward every 12 to 18 inches. A slight outward puff at regular intervals gives the spiral fullness and stops it looking like a stripe painted on the tree.
- Secure every few feet. Every 3 to 4 loops, fasten the ribbon to a central branch with floral wire. This is what keeps the spiral from slipping down over the season.
- Finish at the bottom back. End where you started, at the back of the tree, and tuck the tail under the lower branches or wire it in place. Trim any excess cleanly.
On a tree 7 feet or taller, two spirals — one starting from the left, one from the right — give denser coverage than a single run. And if your spiral starts to drift, do not unwind the whole thing: adjust the next few turns and the eye will forgive a gentle wobble long before it forgives a bare patch.
Loops, Swags, and Bow Clusters
Not every tree wants a full wrap. If your tree is already heavy with ornaments, or you want ribbon as an accent rather than the main event, these three techniques give you the look with far less ribbon.
Loop and Drape (Swags)
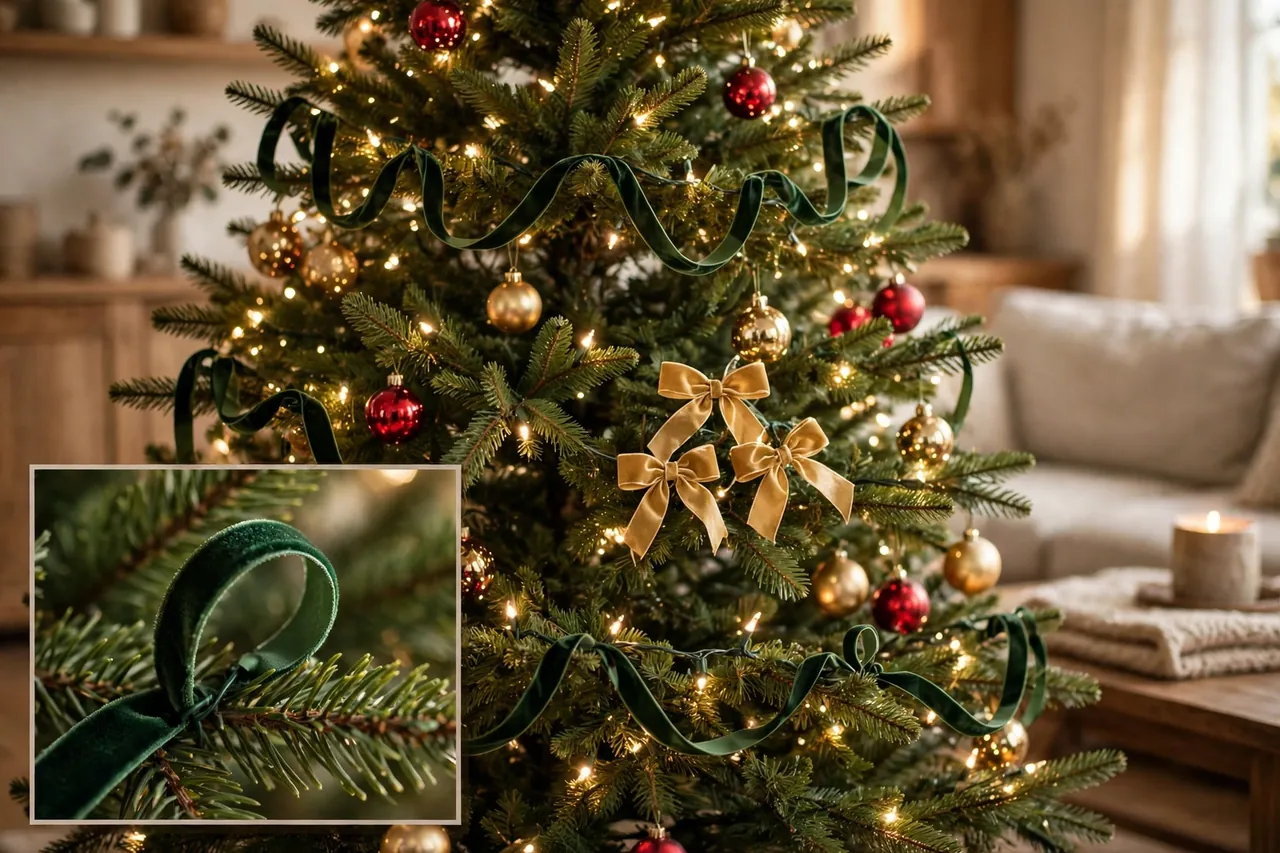
Instead of one continuous run, make individual loops. Hold a loop about 8 to 12 inches long, drape it over a branch, and wire both ends into the inner branches. Move down about 8 to 10 inches, place the next loop slightly off-center, and keep going. The result looks like garland made of ribbon: full, dimensional, and easy to adjust one loop at a time. Christmas tree bows decorations made this way — loops rather than one long wrap — are also the easiest to fix, because a single bad loop comes out without disturbing the rest.
Bow Clusters
Make several bows in matching or complementary ribbon, then wire them to branches in small groups at the top, middle, or bottom of the tree. Bow clusters add a three-dimensional pop without covering the tree, which makes them ideal when you have lots of ornaments you still want to see. Space the clusters evenly and keep the bows the same size, or the tree will look lopsided.
Vertical Stripes and Short Accents
Cut several lengths of ribbon to run from top to bottom, attach each at the top, and let it hang straight down, securing at intervals. The vertical lines make the tree feel taller and guide the eye upward. Short accents work the same way in miniature: tie 12-inch lengths into simple bows on branch tips, a trick that suits a tree with a strong color theme. A Christmas tree with bows scattered this way reads as festive and finished, even with no wrap at all.
Make a Tree Topper Bow
A bow on top of a Christmas tree is the finishing touch that makes the whole tree look intentional. It is also the part people overthink. A good topper bow is just a big, well-fluffed bow wired firmly to the topmost branch, with tails long enough to fall gracefully onto the upper branches.
- Cut your length. For a full topper bow with tails, start with 5 to 7 yards of wide wired ribbon. You can always trim, but you cannot add length back.
- Form the loops. Pinch the ribbon at its center, then form loops on each side — three loops per side makes a full, classic bow. Keep the loops roughly equal, and let each loop twist slightly so the ribbon’s pretty side faces out.
- Wire the center. Twist floral wire tightly around the pinched center, then use the wire ends to attach the bow to the topmost branch. Wire it before you add any other topper, so it sits as the clear focal point.
- Shape the tails. Cut the two tails at an angle or in a V shape, and let them fall down over the top branches. Angle-cut tails look tidy; V-cut tails look like a classic gift bow.
- Fluff from every angle. Pull each loop open, bend the wired edges outward, and check the bow from the front, the sides, and below. A bow only looks good from one angle is a bow that is not finished yet.
If a full topper bow feels like too much, a simpler option works just as well: one large loop with two long tails, wired to the top branch, reads as elegant rather than plain. And if your tree already has a star or angel topper, wire a smaller bow just below it instead of replacing it — the bow frames the topper instead of fighting it.

Fix the 5 Mistakes That Ruin Ribbon
Most ribbon problems come from five habits, and every one of them has a quick fix. Check your tree against this list before you call it done.
Table: Common ribbon mistakes and their fixes
| Mistake | Why it happens | Fix |
|---|---|---|
| Ribbon looks flat and lifeless | Non-wired ribbon, or loops never fluffed | Switch to wired ribbon and fan each loop open by hand. |
| Uneven spacing | Rushing, or never stepping back to look | Step back every few loops and move loops to even gaps. |
| Ribbon sags or slips | Too few anchor points, or heavy ribbon on thin tips | Wire to sturdy inner branches every few loops, not outer tips. |
| Ribbon hides the ornaments | Ribbon added after ornaments, or wrapped too densely | Put ribbon on before ornaments and leave open zones. |
| Bunching at the bottom | Loose tension at the top, tight at the bottom | Keep even, gentle tension and adjust midway down. |
Two more habits are worth breaking. First, do not stretch ribbon tightly like a garland rope — gentle droops between anchor points look natural, and tight ribbon flattens the branches. Second, do not decorate only the front. Guests walk around a tree, and a bare back shows up in every photo taken from the side. Even a corner tree deserves a quick pass on its visible sides.
Mesh Ribbon, Layering, and Ribbon Ideas Worth Trying
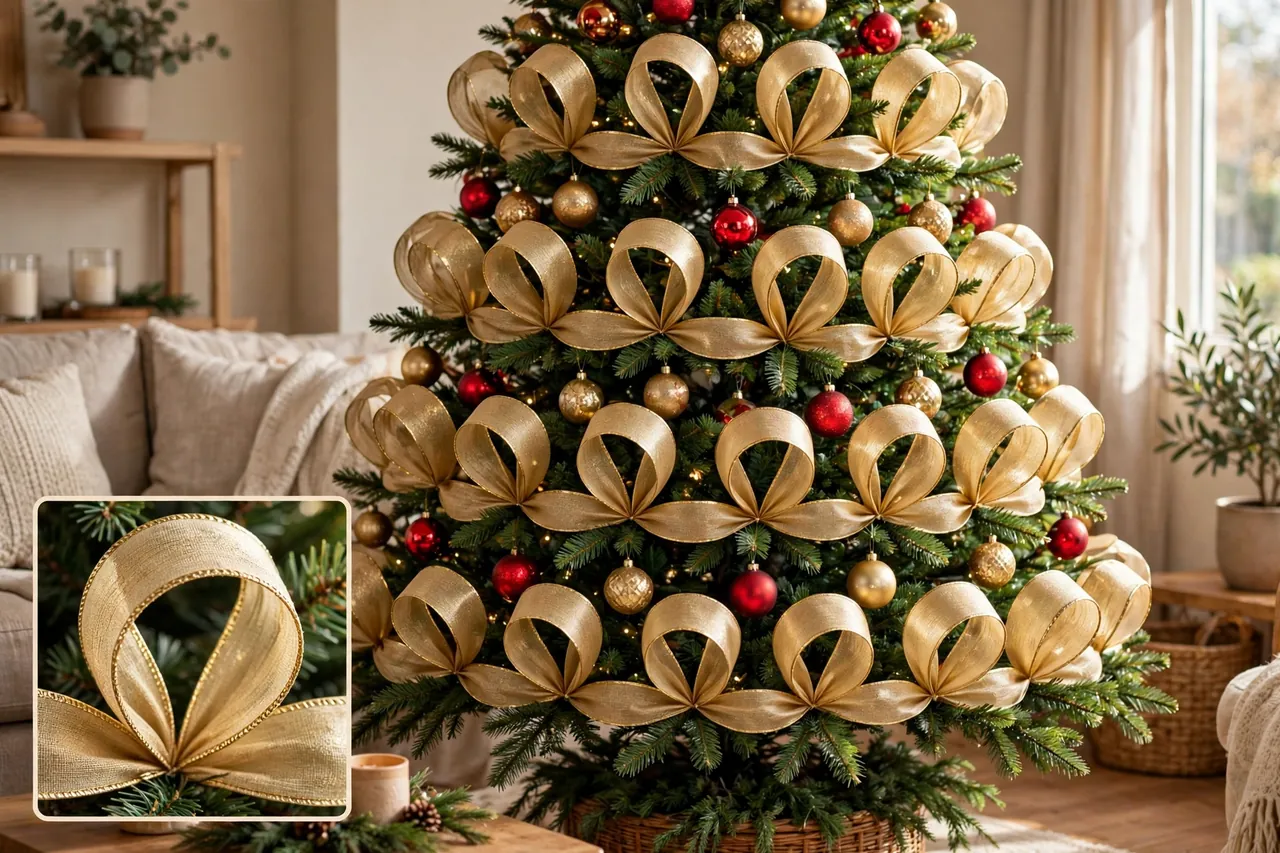
Once the basic method feels easy, a few ribbon ideas can lift the whole tree. Mesh ribbon is the most useful of them: it is light, it holds its shape, and it layers over solid ribbon without adding weight. Try a wide red ribbon with a narrow gold mesh over it for a traditional tree, or silver mesh over white satin for a winter-white tree.
Layering works best when the two ribbons share a color family or a finish. A shiny satin over a matte velvet gives contrast; two loud patterns fight each other. And if you want ideas for ribbon on Christmas trees beyond the classic wrap, try these: wrap ribbon around the base of the tree as a soft collar under the skirt, tie small matching bows on the wreath and garland so the whole room echoes the tree, or use leftover ribbon to tie gift boxes in the same colors. The tree stops looking like a solo project and starts looking like a room with a plan.
When the season ends, reverse the order you put things up in: take the ornaments off first, then gently unwind the ribbon, then the lights. Store ribbon flat in tissue paper rather than rolled tight, and give velvet or satin a quick pass with a handheld steamer before next December. Wired ribbon stored well lasts many seasons; check for frayed edges before you reuse it, and retire any roll whose wire pokes through the fabric.
A short safety note: cut wire ends are sharp, so curl them inward or snip them flush, and keep ribbon away from real candles or open flames. Ribbon is fabric, and fabric near a flame is a risk no beautiful tree is worth.
Related Guides
Tree Decorating Ideas for Christmas · Christmas Trees With Frost: How to Style a Snowy Tree That Glows · What Is a Flocked Christmas Tree?
Frequently Asked Questions
What is the best type of ribbon for a Christmas tree?
Wired ribbon is the most practical choice. The thin wire sewn into each edge holds loops, bows, and cascading trails in shape without sagging or slipping. Satin and velvet wired ribbons are the most popular options, and they suit most trees.
What width of ribbon is best for a Christmas tree?
For most trees, 2.5 to 4 inches is ideal. Larger trees of 8 feet and up can carry 5-inch ribbon for a dramatic effect, while small tabletop trees look best with 1.5 to 2.5-inch ribbon that does not overwhelm them.
How much ribbon do you need for a Christmas tree?
A good rule is 2 to 3 yards of ribbon per foot of tree height for a wrapped or cascading look. A 6-foot tree needs roughly 15 to 20 yards for a single spiral, and a 7.5-foot tree needs 20 to 25 yards. Always buy one spare roll.
Should ribbon go on before or after ornaments?
Ribbon should go on after the lights and before the ornaments. That order lets you weave the ribbon smoothly through the branches, and the ornaments then sit on top of the ribbon where they stay visible and balanced, instead of disappearing underneath it.
How do you stop ribbon falling off a Christmas tree?
Twist a small piece of floral wire around the ribbon and the nearest sturdy branch at every anchor point, and wire bow centers directly to branches rather than letting the bow hang by its own weight. Avoid heavy, wide ribbon on thin outer branch tips, which bend and let the ribbon slide.
Can I use regular craft ribbon on a Christmas tree?
You can, but regular craft ribbon lacks wired edges and durability, so it may not hold its shape and can fray or curl over time. For a tree you want to look good all season, choose decorative wired ribbon made for wreaths and trees instead.
How do I make ribbon bows for my tree?
For a basic multi-loop bow, pinch the center of a length of ribbon, form equal loops on each side, secure the middle with floral wire, and fluff the loops open. Attach the bow with the wire ends, and cut the tails at an angle or in a V shape.
Start with wired ribbon, work top to bottom, and secure as you go — and your tree will look like someone who knows what they are doing decorated it. Because now, you do. When the ribbon is done, step back, enjoy the shape of it for a minute, and then add your ornaments on top of a framework that is already beautiful.