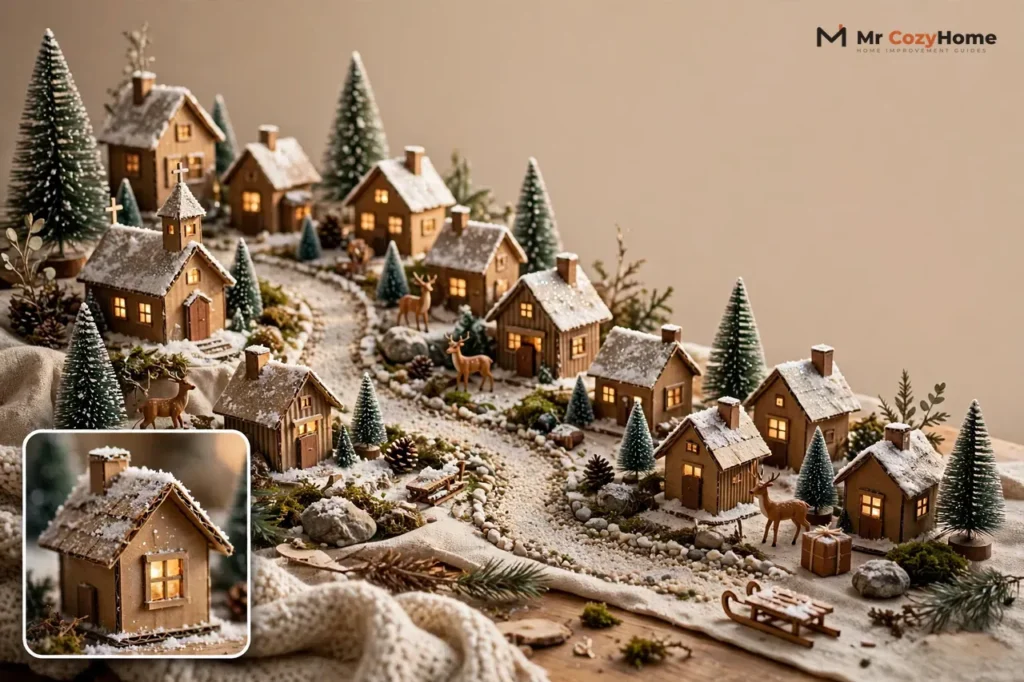
A DIY Christmas village is a miniature winter town you build yourself, house by house, instead of buying a ready-made set. You start with three to five small houses, set them on a sturdy base, add snowy ground and tiny trees, and light the windows with warm LEDs. That is the whole project in one sentence, and a beginner can finish a small village in a single weekend.
Building your own village beats buying one for a simple reason: every piece means something. You can copy your own street, add a bakery with your family name, or build the little church you grew up passing each December. This guide walks you through the full build, from planning and materials to houses, lighting, snow, and storage, so your village looks charming this year and survives until next year.
What You Need to Build a DIY Christmas Village
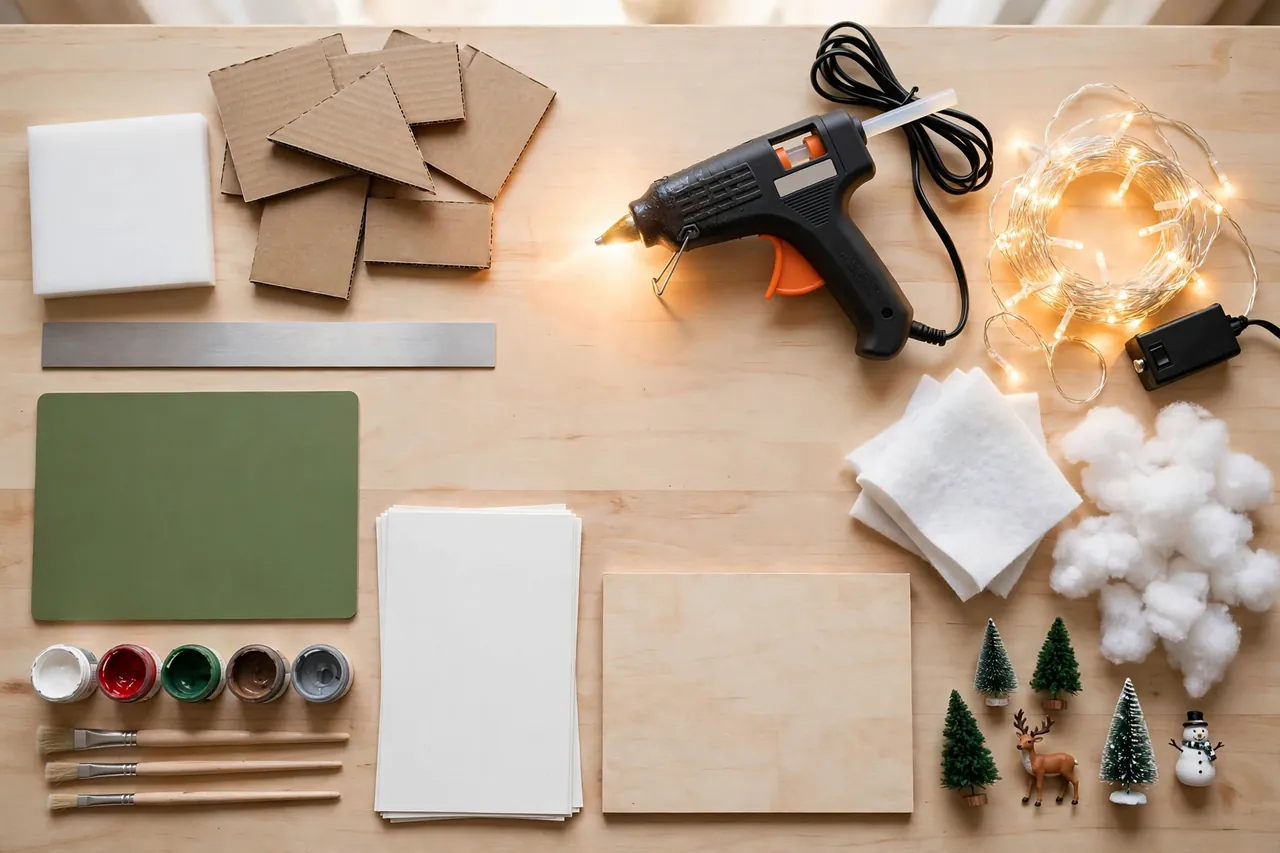
You do not need a workshop or fancy tools to build a do-it-yourself Christmas village. Most builders start with cardboard from shipping boxes, a craft knife, glue, and paint they already own. Gather everything before you cut the first wall, because stopping mid-build to hunt for supplies breaks your rhythm and leads to rushed, crooked houses.
Here is a starter kit that covers a village of four or five houses:
- Cardboard, foam board, or thin craft wood for walls and roofs
- A craft knife, metal ruler, cutting mat, and sharp scissors
- Hot glue gun with extra sticks, plus white craft glue for paper details
- Acrylic paint in white, red, green, brown, and gray, with small brushes
- White cardstock or tissue paper for glowing windows
- Battery-powered warm white LED fairy lights or LED tea lights
- Fake snow: white felt, cotton batting, or a snow blanket
- A sturdy base: a plywood board, a large tray, or thick foam board
- Mini trees, figurines, small pebbles, and twigs for landscaping
Keep one rule in mind as you shop your own home first. Cereal boxes make perfect small cottages, and an old cookie sheet makes a fine base for a first village. You can always buy nicer materials next year, after you know which parts of the hobby you enjoy most.
Choose Your Scale Before You Buy Anything
Scale simply means how big your houses are compared to each other. If one house stands five inches tall and the next stands twelve, your village will look wrong, even if each house looks lovely alone. Pick one height range and stick to it: small tabletop houses usually run four to six inches tall, while mantel villages often run six to eight inches.
Write your scale on a scrap of paper and tape it to your work table. Every time you start a new building, check the paper first. This one habit saves more villages than any other trick in this guide.
Plan Your Village Before You Cut Anything
Sketch your village on paper before you touch a knife. Draw a rough rectangle for your base, then place boxes for each building, a winding line for the main street, and dots for trees. A sketch takes ten minutes, and it stops the most common beginner heartbreak: a finished house that does not fit anywhere.
Plan around one focal point, such as a church, a town hall, or a tall tree in a little square. Put your tallest building at the back and your smallest pieces at the front. This simple depth trick makes a flat table look like a real town rolling into the distance.
Decide your theme early, too. A classic red-and-green village, a snowy white village, or a rustic wood-and-burlap village each need different paint colors and trims. When you mix themes without a plan, the result often looks like a jumble. When you pick one theme, even simple cardboard houses look pulled together.
A Simple Layout That Always Works
- Place your focal building slightly off-center at the back.
- Add two medium houses on either side, angled a little, never in a stiff straight row.
- Run a curving path from the front edge to the focal building.
- Tuck small trees, a lamp post, and figurines along the path.
- Leave open snow space between groups so the eye can rest.
Angle matters more than symmetry. Real towns grow crooked, with houses turned a few degrees this way and that. Turn each house slightly, and your village will instantly feel alive.
Build the Base and Platform
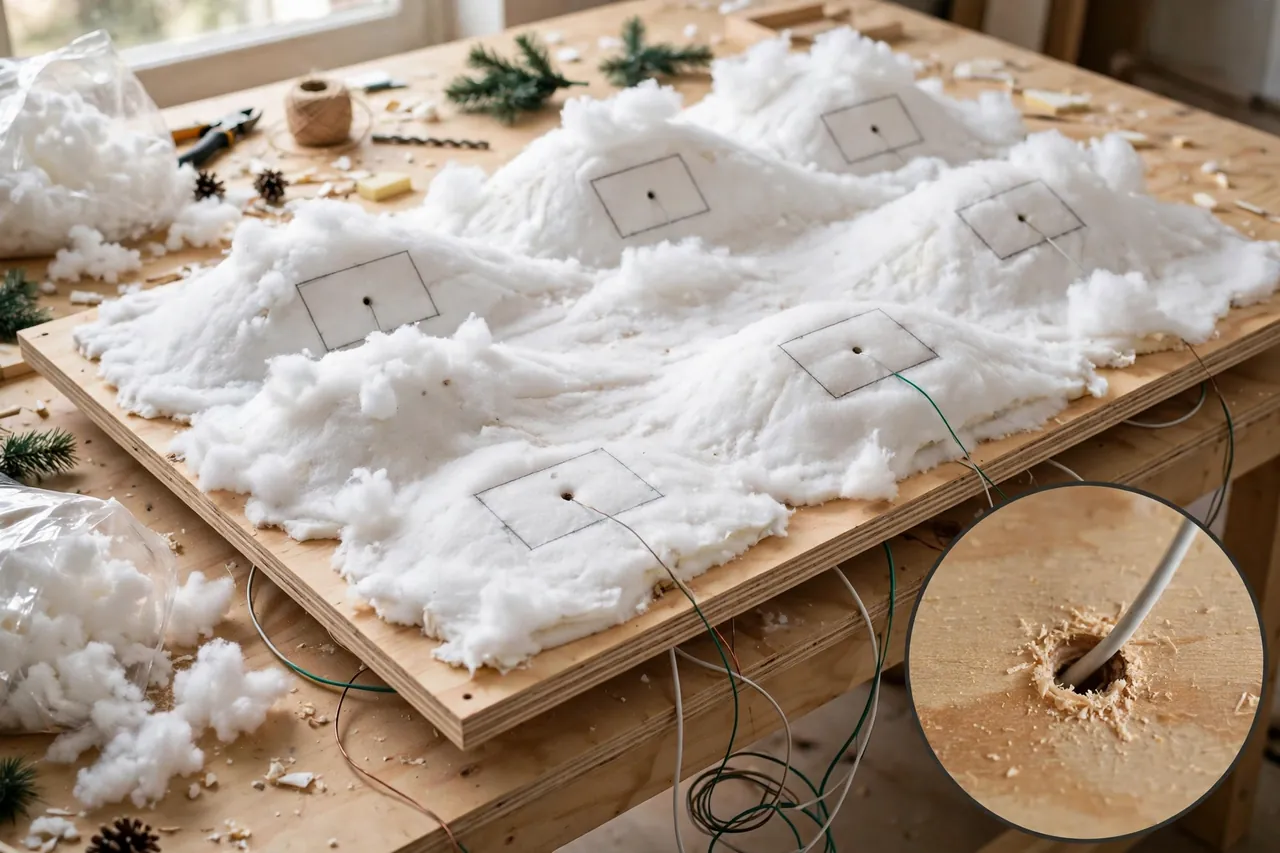
Your base does two jobs: it holds everything steady, and it hides your wiring. A thin piece of plywood, about half an inch thick, makes the strongest base for a village you plan to keep for years. A large baking tray or a thick foam board works well for a first village or a tabletop scene you will pack away each January.
Size your base with room to spare. Measure your planned layout, then add at least three inches on every side for snow, trees, and a border. A crowded base looks cramped and makes it hard to reach a dead light later. A roomy base looks calm and gives each house space to shine.
Build gentle hills before you place any house. Stack folded towels or blocks of foam under your snow cover to raise the back of the village, or sculpt hills from foam and paint them white. Hills add depth for free, and they let the back row peek over the front row instead of hiding behind it.
Hide the Wires While You Still Can
Plan your power before you glue anything down. Decide where each light string will enter the base and where the battery packs or plugs will sit. Drill or cut small holes under each house position so wires can run underneath the base instead of snaking across your snowy streets. Builders who plan platforms this way end up with a clean scene and no visible cords, while builders who skip this step spend December tucking wires under cotton balls. The same under-platform wiring idea appears in eHow’s guide to building a Christmas village platform, which recommends drilling holes under each building and labeling the underside for each light.
Label the underside of the base under each house position with a pencil note, such as “bakery” or “church.” Next year, when you set the village up again, you will know exactly where every wire belongs.
Make Your Own Christmas Village Houses
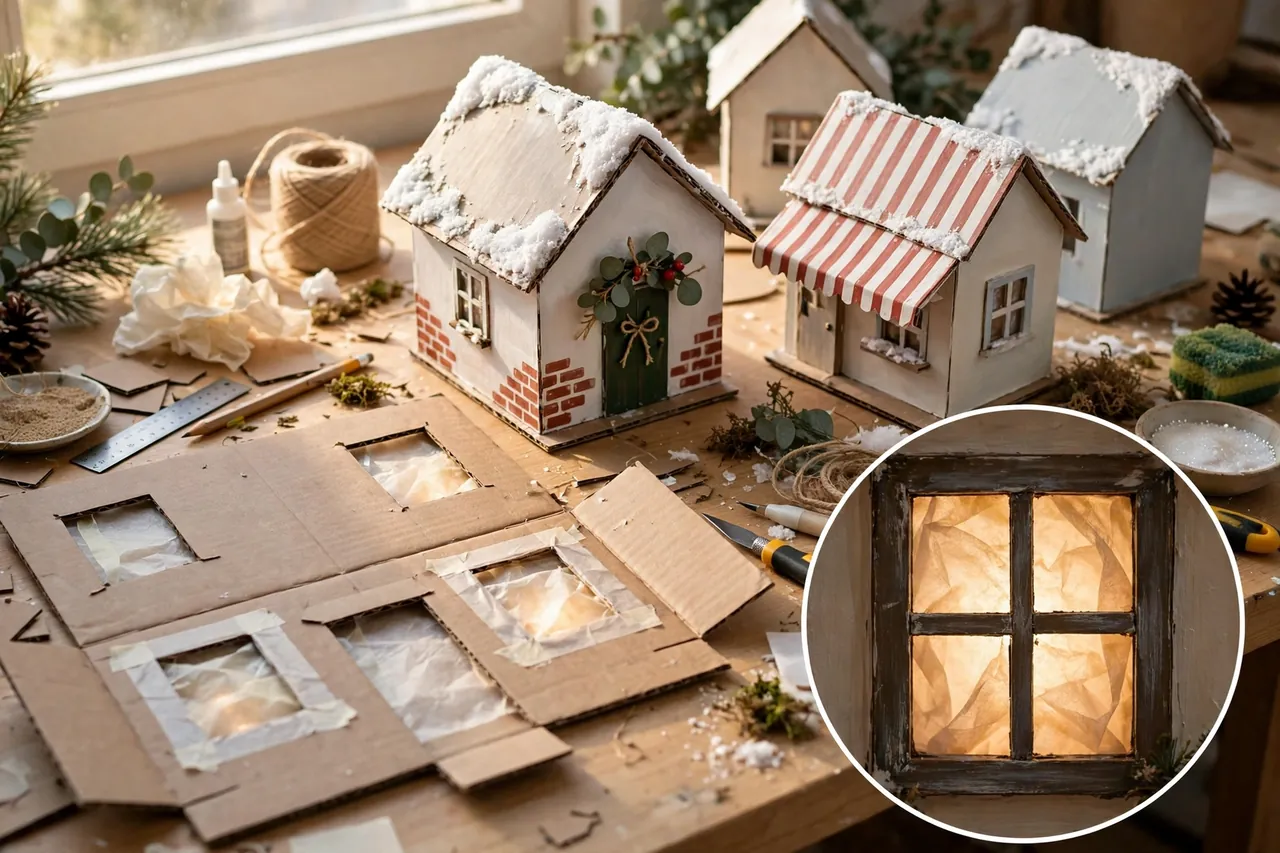
Here comes the fun part. Cardboard houses suit most beginners because cardboard costs almost nothing, cuts easily, and forgives mistakes. Wood houses last longer and feel sturdier, while foam board gives crisp, clean walls that paint beautifully. You can even mix materials: cardboard cottages beside one proud wooden church.
Cardboard Houses, Step by Step
Cut windows and doors before you glue the walls together, because cutting holes in a finished box crushes the shape. Score fold lines with a ruler and a dull knife edge first, then fold, so your corners come out sharp instead of cracked. This flat-first method matches the step-by-step cardboard house approach in TheMasterCraft’s DIY Christmas village houses guide, which also recommends cutting openings before assembly when you plan interior lighting.
- Draw four walls, a base, and two roof pieces on cardboard, all at your chosen scale.
- Cut window and door openings in the walls while they still lie flat.
- Glue tissue paper or vellum behind each window opening so light glows through softly.
- Glue the walls to the base one at a time and hold each joint until it sets.
- Attach the roof last, with an overhang on each side so snow can sit on the edges.
- Paint a white base coat to hide printed cardboard, let it dry, then add your colors.
Paint window frames and doors in a contrasting color, such as dark brown or deep green, and add simple brick lines or shingle marks with a thin brush. Small details beat big ones here: a wreath on one door, a striped awning on the bakery, and a tiny sign over the toy shop tell more story than a whole extra house.
Wood and Foam Houses for a Longer-Lasting Village
Thin craft wood, such as balsa or basswood, cuts cleanly with a craft knife and holds paint without warping. Foam board cuts even more easily and gives you perfectly straight walls, but it dents if you press too hard, so handle finished pieces gently. Whichever material you choose, build one test house first and live with it on your mantel for a day before you commit to a whole street.
For glowing windows in wood or foam houses, cut the openings the same way you would in cardboard, then back them with tissue paper. One small LED inside each house gives a warm, lived-in glow that makes the whole village feel awake at night.
Caution: Cut Safely, Every Single Time
Stop and read this before you pick up a blade. Always cut away from your body, keep your free hand behind the blade path, and cut on a proper cutting mat, never on a tabletop you care about. A dull blade causes more injuries than a sharp one, because you press harder and the knife slips, so change blades often. Keep craft knives and hot glue guns away from small children, and let kids paint and decorate finished houses instead of cutting them.
Light Your Village Safely
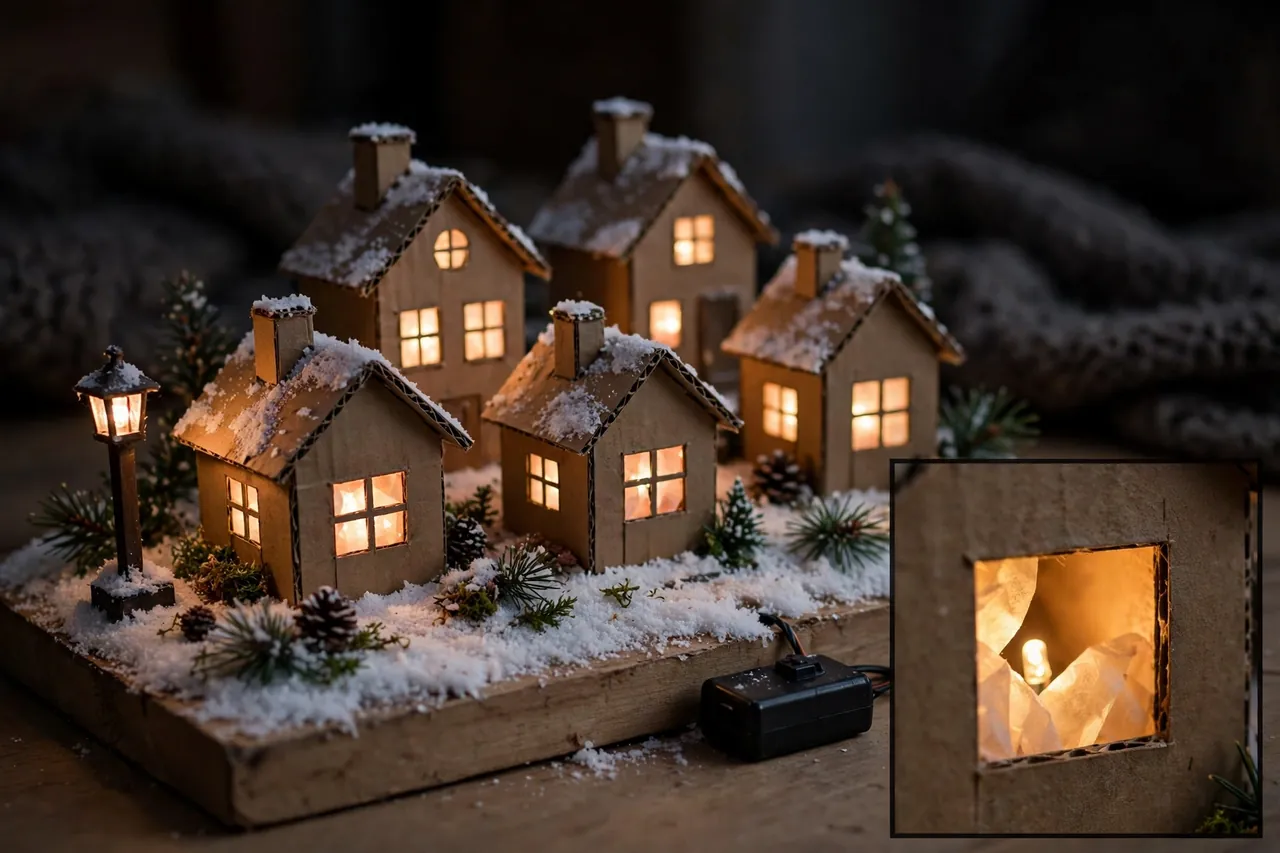
Lighting transforms a nice craft project into a magical one. Warm white LEDs give the cozy glow of lamplight, while cool white lights suit icy outdoor scenes and blue-tinted snow. Pick one main color for your windows and streetlights, and use any second color sparingly as an accent, or the village will look busy instead of warm.
Use only low-heat LED lights inside miniature houses, and never use real candles or any open flame inside a cardboard, wood, or foam building. Battery-powered LED tea lights and micro fairy lights stay cool, run for hours, and let you place a village anywhere, even far from an outlet. This no-flame rule is the same safety line drawn in The Momentree’s DIY Christmas village guide, which warns against unsafe heat sources inside miniature houses. Put one light in each small house and two in a larger building, then step back and check the balance before you add more.
For plug-in strings, count your outlets first and keep the power strip outside the scene, where you can reach its switch without moving houses. If you want the village to switch on by itself each evening, a timer plug handles the job; our guide to using a timer plug walks through setup for a beginner. For broader lighting ideas across your home this season, see our Christmas light ideas guide.
Test the Lights in the Dark
Test every light before you glue a house down, and test the whole village again with the room lights off. Darkness reveals the truth: one glaring window, one dark corner, or one wire glowing through thin snow. Fix those problems now, while houses still lift off the base, instead of after the snow and trees are glued in place.
Keep battery packs reachable, not buried under hills or glued behind houses. You will change batteries at least once during the season, and a hidden pack turns a two-minute job into a full teardown.
Add Snow, Roads, Trees, and Figurines
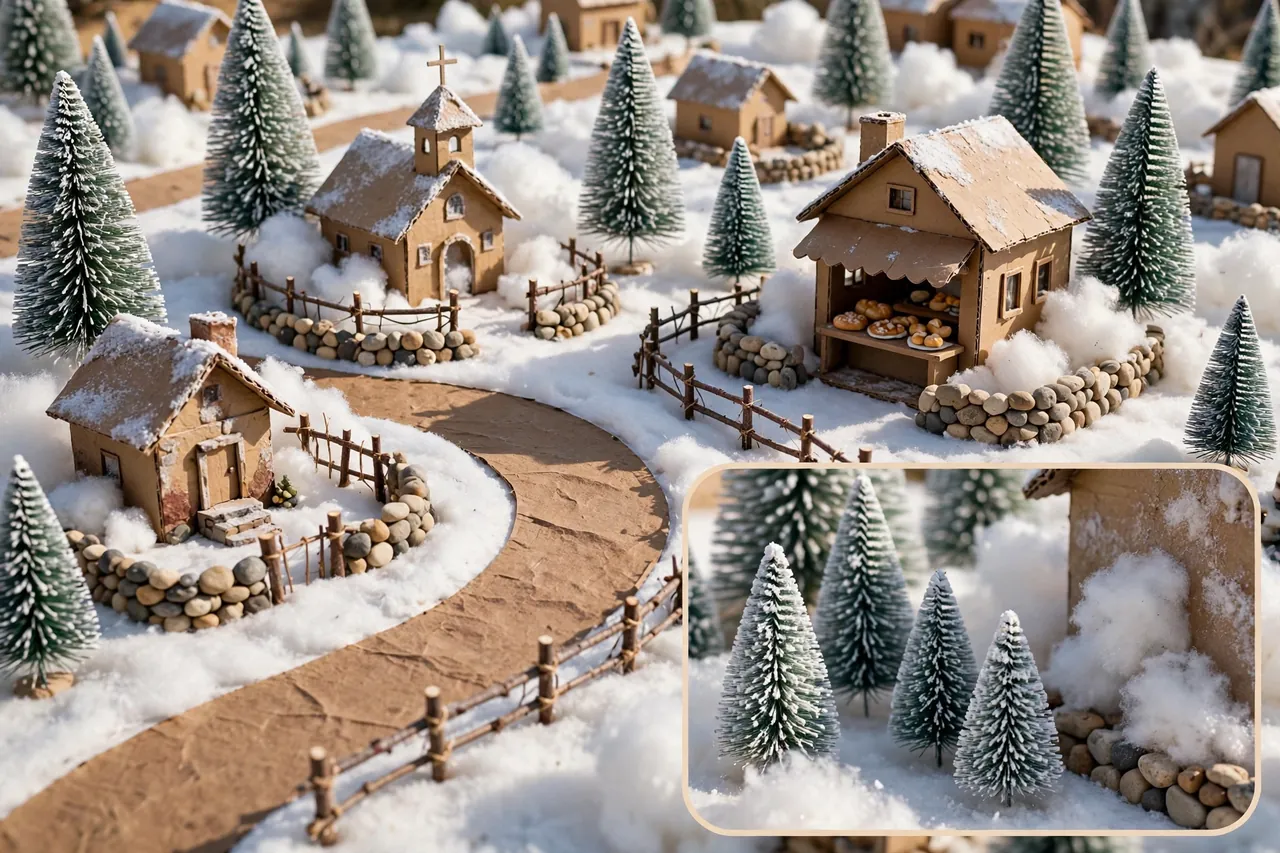
Snow ties the whole village together. A white felt sheet or snow blanket makes a clean, reusable ground cover, while cotton batting pulled thin makes soft drifts against walls and fences. For roofs and windowsills, brush on white glue and sprinkle fake snow or Epsom salt for a frosty, textured edge.
Do not cover everything in snow. Leave paths and doorsteps partly clear, the way a real town would after a morning of shoveling. A few bare patches make the snow look real, while a village buried under a thick white blanket looks flat and hides your hard work.
Build roads from brown craft paper or thin strips of felt, and curve them gently between buildings. Add bottle brush trees in two or three heights, dusted lightly with white paint for frost, and place pebbles or tiny twigs as stone walls and fences. Scatter figurines with a story in mind: carolers by the church, a child pulling a sled, a shopkeeper outside the bakery. Five well-placed figures beat twenty random ones.
If your village sits on a table rather than a mantel, our Christmas table decoration guide offers ideas for dressing the space around it so the whole table feels festive, not just the village itself.
Common Mistakes and Easy Fixes
Most village problems come from rushing one step. The table below lists the mistakes beginners make most often, and the quick fix for each one.
Table: Common DIY Christmas village mistakes and fixes
| Mistake | Why it hurts the scene | Easy fix |
|---|---|---|
| Houses all in a straight row | Looks like a shelf, not a town | Angle each house slightly |
| Every house the same size | No depth or focal point | Add one taller building |
| Lights added last | Wires show everywhere | Plan wiring before gluing |
| Snow piled everywhere | Hides paths and details | Leave paths partly clear |
| Too many figurines | Scene looks cluttered | Keep five to eight figures |
When a house turns out crooked or a paint color looks wrong, do not throw it away. A crooked cottage becomes the old house at the edge of town, and a too-bright paint job calms down under a coat of whitewash or a dusting of snow. Handmade charm covers many small flaws, and that charm is exactly why you built the village yourself.
Store Your Village So It Lasts for Years
A village you build with love deserves better than a cardboard box in a damp garage. Wrap each house in tissue paper, stand houses upright in a sturdy box, and fill gaps with crumpled tissue so nothing shifts. Label the box on two sides with the year and a short list of what sits inside.
Store the village in a dry room, not a damp basement or a hot attic, because moisture warps cardboard and heat softens glue. Slip a small silica packet into the box if your home runs humid. Coil each light string loosely around a piece of cardboard instead of stuffing it into a ball, and store battery packs with batteries removed so they cannot leak over the summer.
When next December arrives, set the base out first, check every light, and touch up any chipped paint before the houses go back on display. A thirty-minute refresh each year keeps a handmade village looking loved for a decade. For the light strings themselves, our guide on how to store Christmas lights covers tangle-free methods that work for village wiring too.
A Quick Safety Note Before You Plug In
This is a craft project, not an electrical project, and it should stay that way. Use only lights rated for indoor use, follow the maker’s instructions for each string, and never join or cut light wires unless the product instructions clearly allow it. Keep the village away from open flames, heaters, and real candles, and switch the lights off when you leave the house or go to bed, unless your lights and timer setup are specifically made for unattended use. Check cords and battery packs once a week during the season for heat, damage, or swelling, and replace anything that looks worn. If a light string feels hot, smells odd, or flickers badly, unplug it and retire it. This guide gives general craft information only; the instructions that come with your lights and tools always win.
Related Guides
Christmas Patio Decorating Ideas for a Warm, Cozy Outdoor Room · Christmas Garland Ideas: 25+ Styles for Every Room in Your Home
Frequently Asked Questions
How do you make a DIY Christmas village?
Start by choosing a theme and a spot for your village. Build or decorate miniature houses, prepare a sturdy base, arrange the buildings with paths and open snow space, add trees and figurines, and finish with warm LED lighting. Plan wiring before you glue anything down.
What can I use to make miniature Christmas houses?
Cardboard, cardstock, foam board, and unfinished wooden houses all work well. Cardboard costs the least and cuts easily, foam board gives crisp walls, and thin craft wood lasts longest. Back window openings with tissue paper so LED light glows through softly.
How can I make a Christmas village on a budget?
Reuse cardboard from shipping and cereal boxes, repurpose ornaments you already own, and make your own snow from felt or cotton batting. Start with three to five buildings and add one or two each year instead of buying everything at once.
What is the best base for a Christmas village?
A stable tabletop, a plywood board, or a sturdy display tray all work, and the best choice depends on your village size and weight. Plywood suits a permanent village, while a tray suits a first village you will pack away each January.
How do I make fake snow for a Christmas village?
White felt and snow blankets make clean, reusable ground cover, while cotton batting pulled thin makes soft drifts. For roofs, brush on white glue and sprinkle fake snow or Epsom salt, and follow each product’s instructions.
How do I light up miniature Christmas houses?
Use battery-operated LED lights or lights made for miniature houses, with one light in each small house. Avoid candles and any open flame inside cardboard, wood, or foam buildings, and keep battery packs reachable for changes.
Your first village does not need to be perfect. It needs three houses you made yourself, a base that holds steady, and lights that glow when the room goes dark. Build those this weekend, add one new building each year, and one day you will unpack a whole little town full of memories and realize you built a family tradition, one tiny house at a time.