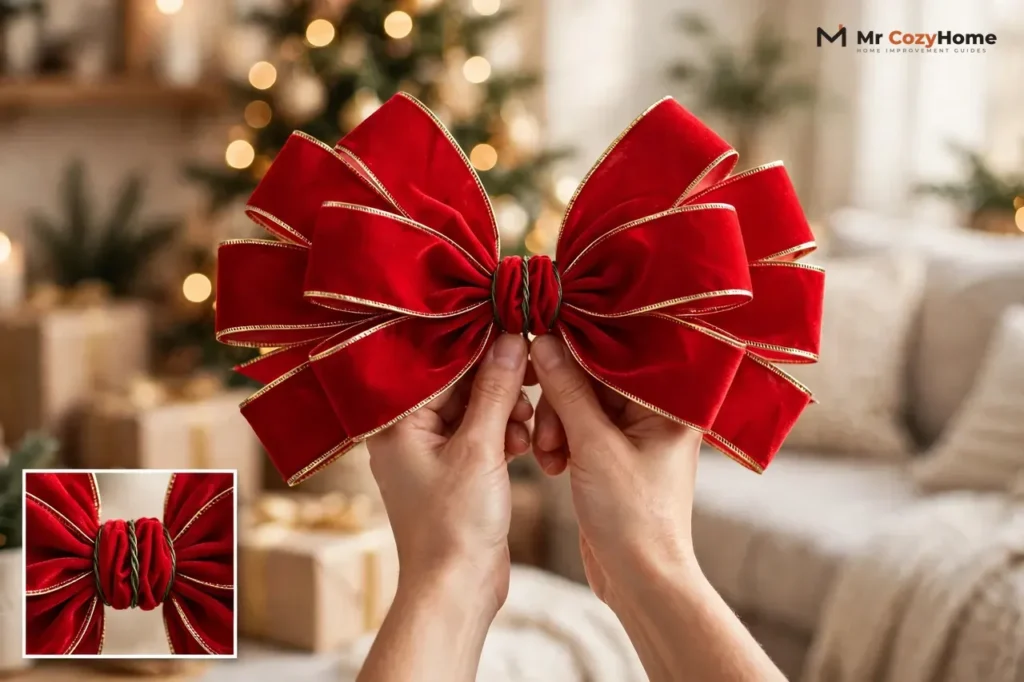
To tie a Christmas ribbon into a full, sturdy bow, make loops with wired ribbon, pinch them together at the center, twist the ribbon so the pretty side faces out, wrap floral wire tightly around the pinched center, and then pull each loop open and fluff it into shape. That pinch, twist, and wire sequence is the whole secret. It works for gift bows, wreath bows, and tree topper bows, and it takes about five minutes once you have tried it twice.
If your past bows have gone flat, floppy, or lopsided, the ribbon is almost never the only problem. Most sad bows come from three small mistakes: loops of different sizes, a loose center, or ribbon with no wire in its edges. Fix those three things, and the same spool of ribbon suddenly makes a bow that looks like it came from a shop. This guide shows you exactly how, step by step, with no special tools and no experience needed.
One clear boundary before we start: this guide is about tying — the knots, loops, and bows themselves. It does not cover draping or wrapping long runs of ribbon around a tree. If you want that part, our guide on how to put ribbon on a Christmas tree walks through cascades, spirals, and loops on the branches. Here, you learn the bow craft, and you can use the finished bows anywhere: on gifts, wreaths, garlands, chairs, and the top of the tree.
Before You Tie: Pick the Right Ribbon
The ribbon you pick decides how hard the rest of the job feels. Beginners should start with wired ribbon, because the thin wire sewn into each edge holds a loop open after you shape it. Unwired ribbon can still make a lovely bow, but it needs a tighter knot and more patience, and it will never stand as tall as a wired bow.
Wired Ribbon vs. Unwired Ribbon
Wired ribbon has a thin, flexible wire along both edges. You bend a loop, and it stays bent. You fluff a bow, and it stays fluffed. That is why nearly every wreath bow and tree topper bow you admire is wired. Check before you buy that the wire runs along both edges, not just one, because single-edge wire gives you a bow that leans to one side.
Unwired ribbon feels softer and drapes more naturally. Satin, grosgrain, velvet, and sheer organza all come in unwired versions, and they suit small gift bows and delicate packages beautifully. The trade-off is real, though: unwired loops relax and flatten over a few hours, especially in a warm room. If you love an unwired ribbon, use it for gifts you will hand over the same day, and save wired ribbon for wreaths and toppers that must look good all season.
Which Material Suits Which Bow
Satin gives a smooth, shiny finish and suits classic, elegant gifts. Velvet feels thick and rich, and it adds warmth to a traditional red-and-green scheme, although its thickness makes tight knots harder to tie. Grosgrain has a ribbed texture that grips well, so it is a forgiving choice for a first bow. Burlap and linen bring a rustic, farmhouse feel. Sheer or mesh ribbon looks light and airy, and it layers beautifully over a solid ribbon for extra depth.
For your first few bows, buy one spool of 2.5-inch wired ribbon in a color you love. It is wide enough to show off the loops, stiff enough to hold them, and easy to handle. Once the basic method feels natural, you can branch out into narrower gift ribbons and wider wreath ribbons.
Match the Width to the Job
Width matters more than most people expect. A ribbon that is too narrow disappears on a wreath, and one that is too wide swallows a small gift whole. Use this table as your starting point, then adjust to taste.
Table: Ribbon width by project
| Project | Ribbon width | Why it works |
|---|---|---|
| Small gift | 1 to 1.5 inches | Neat loops that suit the box size |
| Large gift | 1.5 to 2.5 inches | Full loops that read from across the room |
| Wreath bow | 2.5 inches | Wide enough for a full, bold bow |
| Tree topper bow | 2.5 to 4 inches | Big loops that crown the tree |
| Chair or banister bow | 2.5 inches | Shows up well without overwhelming the chair |
What You Need
You need very little, and you probably own most of it already. Gather everything before you start, because a bow falls apart fast if you let go of the center to hunt for wire.
- Wired ribbon, on the roll, plus one spare roll if you plan to make several bows
- Floral wire, pipe cleaners, or zip ties for securing the center
- Sharp scissors — dull scissors chew ribbon edges and leave frays
- Wire cutters, if your ribbon is heavily wired
- A short length of matching ribbon to wrap around the finished center
- Optional: a dab of hot glue for a permanent center wrap
Work from the roll when you can, instead of cutting a length first. You will waste less ribbon, and you will never run short halfway through your last loop. Cut only when the bow is secured and you are ready to shape the tails.
How to Tie a Christmas Ribbon: The Classic Loop Bow
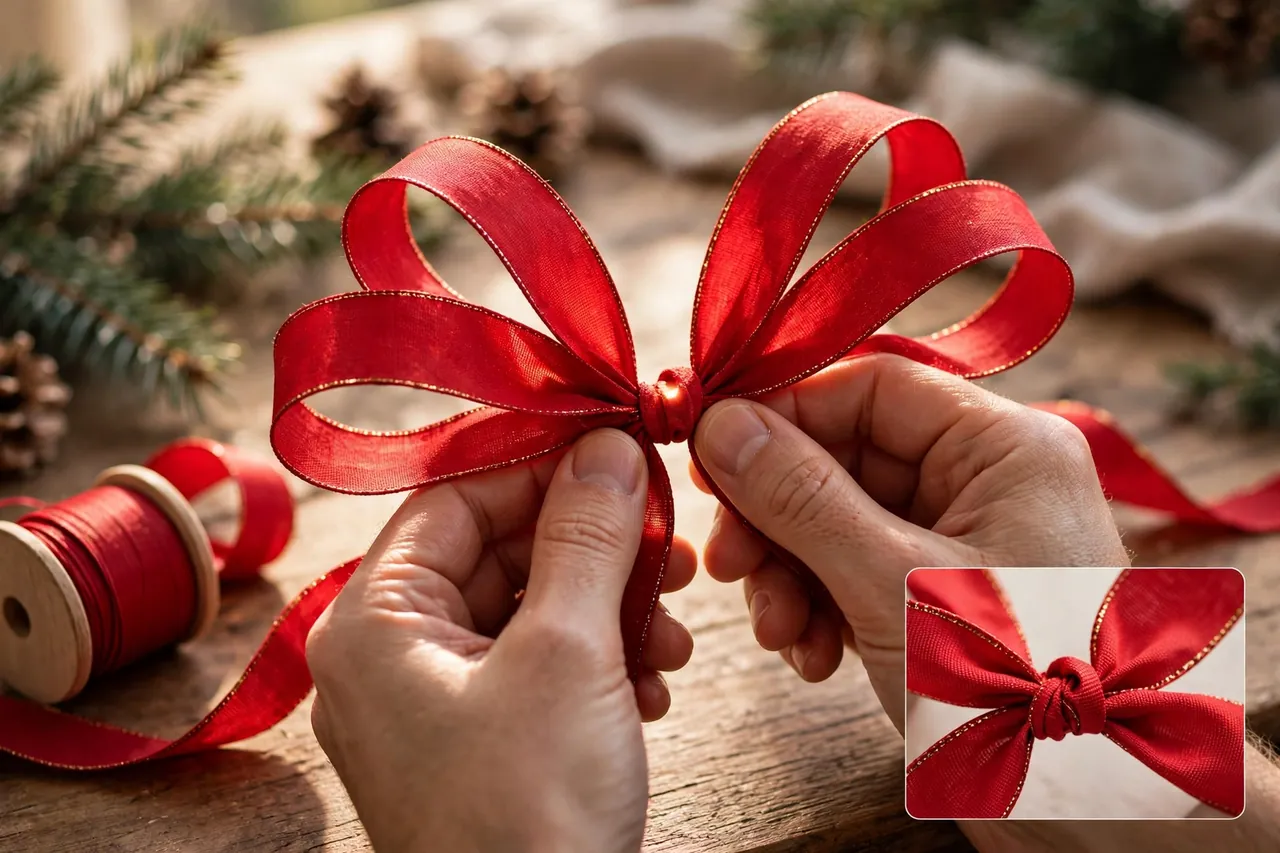
This is the one method to learn first. Master it, and every other bow in this guide is just a bigger, smaller, or layered version of the same moves. It makes a full, symmetrical bow that suits gifts, wreaths, and garlands.
Before you cut anything, a quick safety note: keep your fingers clear of the scissor blades when you trim tails, and bend any cut wire ends inward so they cannot scratch hands or snag wrapping paper. Cut wire ends are sharp, so fold them flat against the back of the bow.
- Make the center loop. Pull about 6 inches of ribbon from the roll and fold it into a small loop. Pinch the base of that loop firmly between your thumb and forefinger. This loop becomes the center of your bow.
- Twist behind the loop. Give the ribbon a half-twist at the back of the pinched center, so the pretty side of the ribbon faces outward again. This twist is the move most beginners skip, and skipping it is why one side of a bow often shows the dull back of the ribbon.
- Make a loop on one side. Pull ribbon out to one side to form a loop about 4 to 6 inches long, then bring it back to the pinched center. Hold it in place with the same pinched grip.
- Twist again and loop the other side. Twist the ribbon behind the center once more, then form a loop of the same size on the opposite side. Keep your grip tight the whole time — a loose center is the number one cause of a bow that falls apart when you fluff it.
- Keep alternating sides. Repeat the twist-and-loop steps until you have three loops on each side, plus the small center loop. For a fuller bow, add a fourth loop per side. Use your fingers or a pencil as a rough guide if your loops keep coming out uneven.
- Secure the center. While you still hold the pinched center, wrap floral wire tightly around it two or three times, then twist the wire ends together at the back. Pull the wire snug — not so hard that you cut the ribbon, but firm enough that nothing slides.
- Cut the ribbon from the roll. Now, and only now, cut the working end free. Leave enough length for tails if you want them, or cut close to the center for a compact bow.
- Fluff from the bottom up. Start with the lowest loops and pull each one gently outward, bending the wired edges to open the loop into a rounded shape. Work your way up, turning some loops slightly forward and others slightly back, until the bow looks full from every angle.
That is the whole method: loop, twist, loop, wire, fluff. Your first bow may look a little uneven, and that is normal. Your third bow will look better than most store-bought ones, because you can adjust each loop by hand instead of accepting whatever came out of a bag.
How to Tie a Simple Gift Bow With Unwired Ribbon
Unwired ribbon needs a different approach, because there is no wire to hold the loops open. Here you tie a true knot, like a shoelace bow, and let the knot itself do the holding. This method suits satin and grosgrain ribbon on wrapped gifts.
- Wrap the ribbon around the box. Run the ribbon around the gift one way, then cross it and run it around the other way, so it forms a cross on the bottom and meets on top. Tie a simple knot where the ends meet and pull it snug.
- Form the first loop. Take one end and fold it into a loop about 3 to 4 inches long. Hold the base of the loop against the knot with your thumb.
- Wrap the second end around the center. Bring the other end across the front of the loop, around the back, and through the gap, just like tying shoelaces. Pull it through slowly so the knot stays centered.
- Pull both loops even. Tug each loop gently until they match in size, then pull the tails until the knot sits tight. Adjust the loops by pulling them outward, not by yanking the knot tighter, which only wrinkles the ribbon.
- Trim the tails. Cut each tail at an angle or into a V shape, and give the loops one last fluff. Because unwired ribbon relaxes, make the loops slightly fuller than you think you need — they will settle a little over the next hour.
A small dot of double-sided tape under the center knot can stop a gift bow from sliding around on glossy wrapping paper. Hide the tape completely under the knot, so it does the work without showing.
How to Tie a Big, Full Wreath Bow
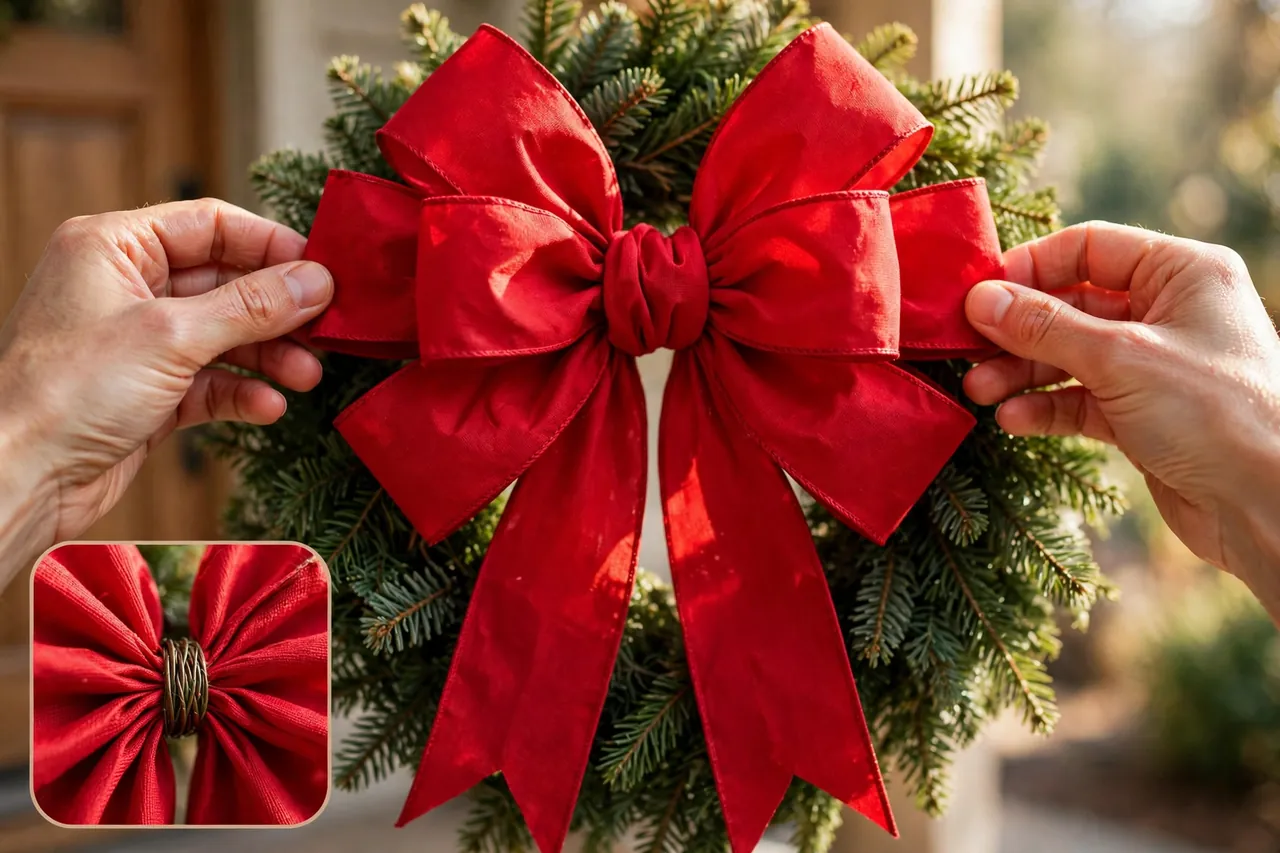
A wreath bow is the classic loop bow, scaled up. The method stays the same, but the ribbon gets wider, the loops get longer, and the tails get their own moment. The Frugal Girls wreath-bow tutorial uses the same loop, twist, and wire sequence with 2.5-inch wired ribbon and 18-inch tails, which is a good benchmark for a front-door wreath.
- Start with plenty of ribbon. For a full wreath bow, work from the roll and plan on about 6 feet of 2.5-inch wired ribbon for the loops, plus 3 feet more for the tails. It is far better to have too much than to run short on the last loop.
- Make a small center loop. Fold a small loop and pinch it, just as you did for the classic bow. Twist behind the center so the pretty side faces out.
- Build three loops per side. Form loops of 6 to 8 inches on each side, twisting behind the center between every loop. Let each new loop grow slightly larger than the last, so the bow fans outward instead of sitting flat.
- Wire the center tightly. Wrap floral wire around the pinched center and twist it firmly at the back. Leave the wire ends long — you will use them to attach the bow to the wreath.
- Add separate tails. Cut two pieces of ribbon, each about 18 inches long. Lay them flat, overlapping at the top so they spread apart at an angle, then feed the tops through the center loop, fold them over at the back, and wire them in place.
- Shape the tails. Cut each tail end at an angle, or fold the tail in half and cut a small triangle from the fold to make a V shape. Bend the wired edges gently so the tails curve instead of hanging stiffly.
- Fluff from every angle. Pull the outer loops wider and push the inner loops closer together to add depth. Check the bow from the front, the sides, and below, because a wreath bow gets seen from all directions on a front door.
- Attach with the wire ends. Twist the long wire ends around the wreath frame or through the greenery, then tuck the sharp ends into the back so they cannot scratch the door.
For an outdoor wreath, choose a ribbon that can handle weather, such as a sturdy wired grosgrain or a weather-resistant mesh, and wire the bow on a little tighter than you would indoors. Wind is the enemy of a loose center, so a firm wire wrap matters even more outside.
How to Tie a Tree Topper Bow
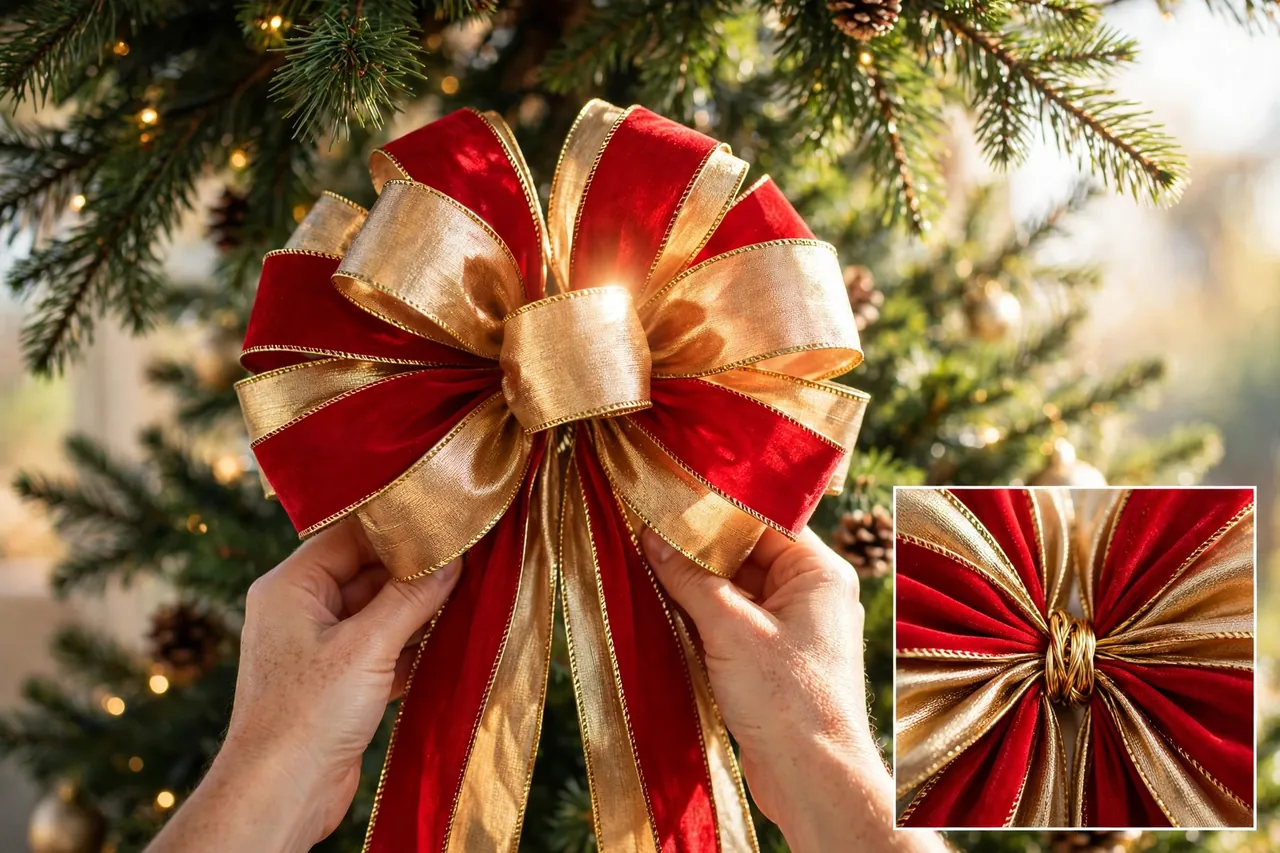
A tree topper bow is a wreath bow with more presence. It crowns the tree, so it needs bigger loops, longer tails, and a firm attachment. Note the boundary here: this section teaches you to tie the topper bow itself. It does not teach you to drape ribbon down the tree — that is the separate draping guide linked at the top of this article.
- Use wide wired ribbon. Choose 2.5- to 4-inch wired ribbon, and plan on 5 to 7 yards for a full topper bow with tails. Two layered ribbons — a wide solid under a narrower patterned one — give a rich, layered look.
- Layer the ribbons if you use two. Lay both ribbons together and treat them as one piece for every loop and twist. This keeps the patterns aligned instead of drifting apart.
- Form four loops per side. Make loops of 6 to 8 inches, twisting behind the center between loops so the pretty side always faces out. A topper bow needs that extra loop per side to look full from below, which is how most people see it.
- Wire the center and add tails. Wrap floral wire or a zip tie tightly around the center, then add long tails — 18 to 24 inches each — wired to the back of the bow. Cut the tails into V shapes and let them fall over the top branches.
- Fluff into a round shape. Pull loops outward in all directions, not just left and right, until the bow reads as a full, round crown rather than a flat fan. For an extra-full topper, make two bows the same way and wire them back to back.
- Attach firmly. Wire the bow to the topmost branch with the long wire ends, and check it from below and from across the room. A topper that only looks good from one angle is not finished yet.
If your tree already has a star or angel topper, wire a smaller bow just below it instead of replacing it. The bow frames the topper instead of fighting it, and the tree still gets that finished crown.
How to Tie a Double-Layer Bow
A double-layer bow stacks two ribbons — usually a wide one and a narrow one — so the finished bow has depth and contrast. It looks fancy, but the tying is simple, because you handle both ribbons as one.
- Layer the ribbons. Place the narrow ribbon centered on top of the wide ribbon, pretty sides up, and hold them together.
- Tie the classic loop bow. Follow the classic method — loop, twist, loop — treating both ribbons as a single piece. Keep the narrow ribbon centered as you go, or it will slide to one edge.
- Wire and fluff in layers. After wiring the center, fluff the wide loops first, then pull the narrow loops slightly forward so they sit proud of the wide ones. The two layers should read as one bow, not two bows fighting each other.
This is the bow to use when you want a gift or wreath to look special without buying new ribbon. A narrow gold ribbon over a wide red one, or a narrow plaid over a wide green, turns a plain bow into a centerpiece.
Finishing Touches That Make a Bow Look Store-Bought
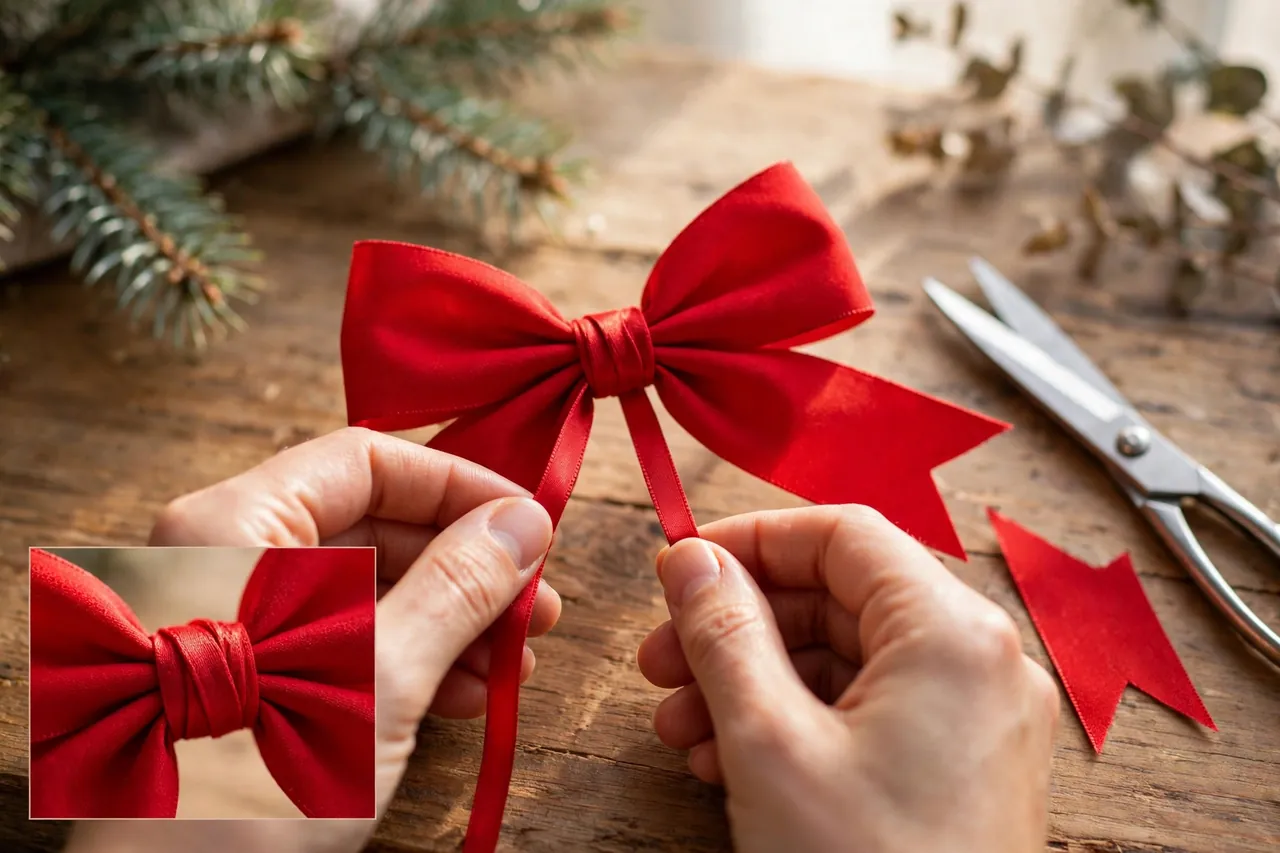
The difference between a homemade bow and a store-bought one is almost never the tying. It is the finishing. Four small touches do most of the work.
Cut Tails Cleanly
Cut tails at a slant for a tidy finish, or fold each tail in half lengthwise and snip a small triangle from the folded edge to make a classic V, sometimes called a dovetail. Sharp scissors matter here more than anywhere else. Dull blades chew the edge and leave frays that no amount of fluffing can hide.
Wrap the Center
A bare wire center looks unfinished. Cut a short piece of matching ribbon, fold its long edges toward the middle to make a narrow strip, and wrap it around the center of the bow. Secure it at the back with a dab of hot glue or a small piece of tape. This single touch hides the wire and gives the bow a polished, intentional look.
If you use a hot glue gun, keep your fingers clear of the nozzle and the melted glue, and set the gun on a heat-safe surface while it warms up. A tiny dab is enough — a puddle of glue stiffens the ribbon and shows through thin fabrics.
Fluff Last, and Fluff Slowly
Fluffing is not a quick shake. Start at the bottom loops and work upward, pulling each loop open and bending its wired edges into a rounded shape. Turn some loops slightly forward and others slightly back, so the bow has depth instead of looking like a flat fan. Then step back and look at it from a few feet away, because a bow that looks good in your hands can still look lopsided from across the room.
Hide the Mechanics
Twist wire ends to the back, tuck sharp cut ends into the bow, and hide tape or glue behind the center wrap. Nothing that holds the bow together should be visible from the front. If you can see the mechanics, the eye reads the bow as unfinished, even when the loops are perfect.
Bow Sizes at a Glance
How much ribbon you need depends on the bow, not on a single rule. Use this table to plan before you cut, and always buy one spare roll — running out with one gift left is the most common ribbon frustration.
Table: Ribbon length and loop count by bow size
| Bow | Ribbon length | Loops |
|---|---|---|
| Small gift bow | 1 to 1.5 yards | 2 per side |
| Medium gift bow | 2 to 3 yards | 3 per side |
| Wreath bow | 6 feet for loops, plus 3 feet for tails | 3 per side |
| Tree topper bow | 5 to 7 yards | 4 per side |
| Double-layer bow | Same as the single bow, times two ribbons | 3 per side |
These lengths come from the tutorials cited in this guide and from standard craft practice, and they assume medium fullness. A very full, layered bow needs more, and a slim, simple bow needs less. When in doubt, work from the roll and cut only after the center is wired — you can always trim, but you cannot add length back.
Fixing Floppy Bows: What Went Wrong and How to Fix It
Almost every bow problem has a quick fix, and most of them trace back to the center or the ribbon choice. Check your bow against this table before you start over.
Table: Common bow problems and their fixes
| Problem | Likely cause | Fix |
|---|---|---|
| Bow goes flat | Unwired ribbon, or loops never fluffed | Switch to wired ribbon and fan each loop open by hand |
| Bow looks lopsided | Uneven loops or uneven tension | Remake with equal loop sizes and steady pinching |
| Bow comes undone | Loose center wire | Rewire tightly and add a center wrap |
| Dull side shows | Missed twist behind the center | Twist the ribbon at the back between every loop |
| Tails fray | Dull scissors | Recut with sharp scissors at an angle or V shape |
| Bow slides on a gift | Smooth paper, no anchor | Hide double-sided tape under the center knot |
If a bow still looks wrong after two fixes, untie it and start fresh rather than forcing it. Ribbon has a memory for creases, so a bow that has been pulled and twisted too many times will fight you. A fresh piece from the roll, tied slowly, almost always beats a rescued one.
How to Store Ribbon and Finished Bows
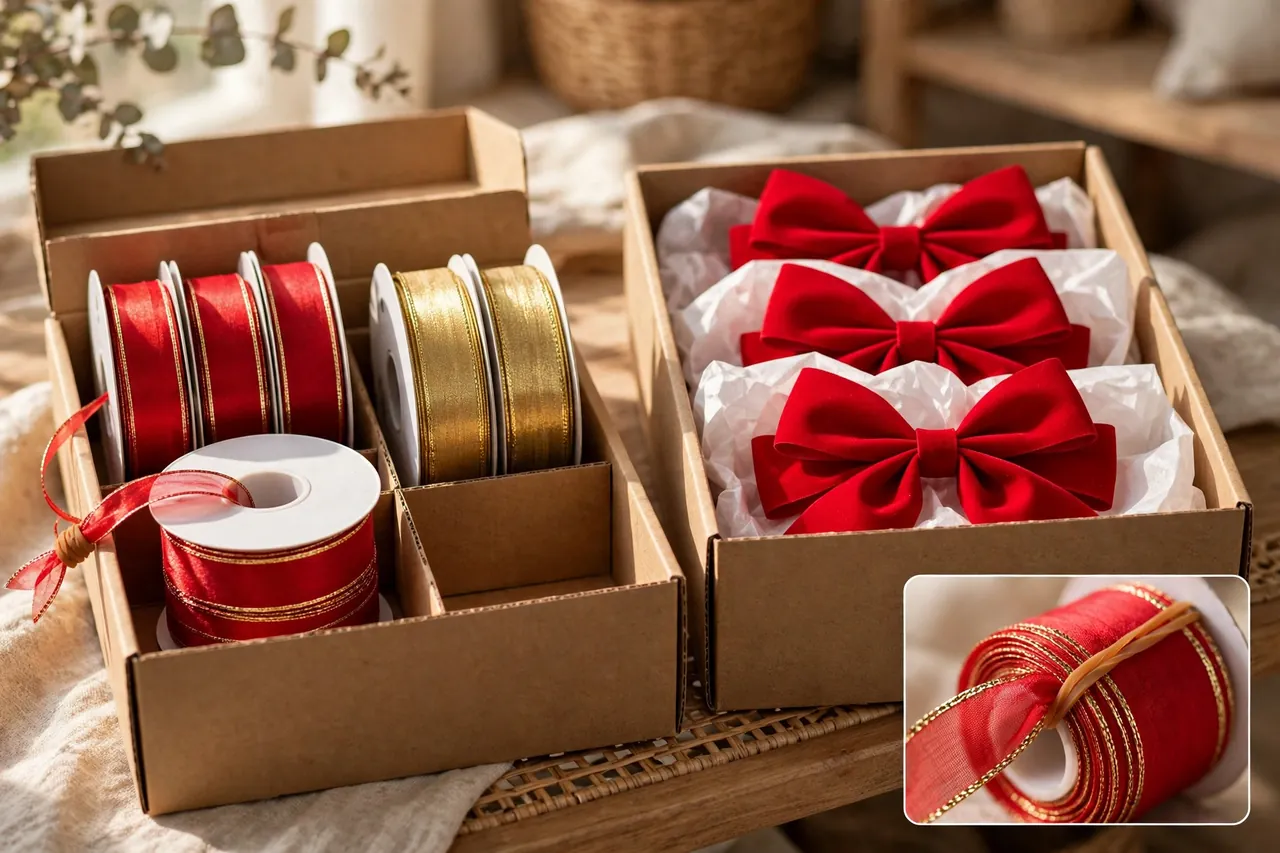
Good storage saves you money and frustration next December. Ribbon left loose in a box comes back creased, tangled, and dusty, and a crushed bow rarely fluffs back to life.
Store Ribbon on the Roll
Keep ribbon on its spool, and slip a rubber band around the loose end so it cannot unwind. Stand spools upright in a box or on a dowel, grouped by color, so you can see what you own at a glance. Keep them away from heat and damp, which fade colors and weaken wire edges over time.
Store Finished Bows Without Crushing Them
Place finished bows in a sturdy box with tissue paper between layers, and never stack heavy items on top of them. For wreath bows, hang the wreath on a hook or store it in a wreath bag with the bow facing up. If a stored bow comes out a little flat, you can usually revive a wired bow by refluffing each loop by hand — one more reason to favor wired ribbon for bows you plan to reuse.
Reuse, Repair, or Retire
Reuse bows that still hold their shape after a gentle refluff. Repair a bow with one crushed loop by rewiring its center and refluffing the rest. Retire ribbon that is frayed, faded, or kinked beyond smoothing — it will make every bow you tie with it look tired, no matter how good your technique is.
A Quick Safety Note
This is a low-risk craft, but it still involves sharp and hot tools, so a few habits keep it safe. Cut away from your fingers and your body, and never cut toward a hand that holds the ribbon. Bend cut wire ends inward and tuck them behind the bow, so they cannot scratch skin or snag fabric. If you use a hot glue gun, keep it on a heat-safe surface, keep fingers clear of melted glue, and never leave it plugged in and unattended. Keep small pieces of wire, scissors, and glue guns out of reach of young children, and let children practice bow tying with blunt-tip scissors and soft ribbon only. If a cut wire end does scratch the skin, clean it as you would any small scratch and watch for irritation.
Disclaimer: This guide describes a home craft for decoration. It is general information, not professional advice. Take care with scissors, wire, and hot glue, and stop and seek help if a tool or material feels unsafe for your situation.
Related Guides
If you enjoyed tying bows, these guides from MrCozyHome take the next step. Learn how to put ribbon on a Christmas tree when you want to drape ribbon down the branches, browse tree decorating ideas for Christmas for the whole-tree picture, plan the table with Christmas table decoration ideas, and tie your colors together with themes for Christmas decoration.
Frequently Asked Questions
How long should the ribbon be for a standard bow?
For a standard gift bow, start with about 2 to 3 yards of ribbon, which gives you three loops per side plus tails. A small bow needs about 1 to 1.5 yards, while a wreath bow needs about 6 feet for loops plus 3 feet for tails. Work from the roll when you can, so you never run short mid-bow.
What is the best ribbon width for gift wrapping?
A width of 1 inch to 1.5 inches is ideal for most gift wrapping, though it varies with the package size. Small gifts suit 1-inch ribbon, large gifts look better with 1.5 to 2.5 inches, and wreath or topper bows need 2.5 inches or more to read from across the room.
How do I keep my bow from unraveling?
Secure the center knot tightly, and for a bow that must last all season, wrap floral wire firmly around the pinched center and twist it at the back. A small dot of hot glue hidden under a center wrap adds extra hold for permanent bows, and a piece of double-sided tape under the knot stops a gift bow from sliding.
Why does my bow look lopsided?
Uneven loops are usually caused by inconsistent tension while tying, or by loops of different sizes. Keep the same pinched grip at the center for every loop, match each new loop to the size of the last one, and twist the ribbon behind the center between loops so the pretty side always faces out.
Can I reuse bows?
Yes, carefully stored pre-made bows can be reused several times if handled gently. Store them in a sturdy box with tissue between layers, never stack heavy items on top, and refluff wired loops by hand when you take them out. Retire bows that are frayed, faded, or crushed beyond refluffing.
Is there a difference between tying a bow with wired ribbon versus non-wired ribbon?
Yes. Wired ribbon holds its shape better because of the wire along its edges, which makes it easier to create structured, voluminous bows. Non-wired ribbon is softer and drapes more naturally, so it suits delicate gift bows but needs a tighter knot and will relax and flatten over time.
Your Next Bow Will Be Better Than Your First
Here is the honest truth about bow tying: your first bow teaches your hands the moves, and your third bow is the one you will want to photograph. So grab that spool of wired ribbon, make one practice bow on an empty box, and then make the real one. By the time the gifts are wrapped and the wreath is on the door, you will wonder why store-bought bows ever seemed like the easier option. Start with the classic loop bow, wire the center tightly, fluff slowly, and enjoy a Christmas that looks handmade in the best possible way.